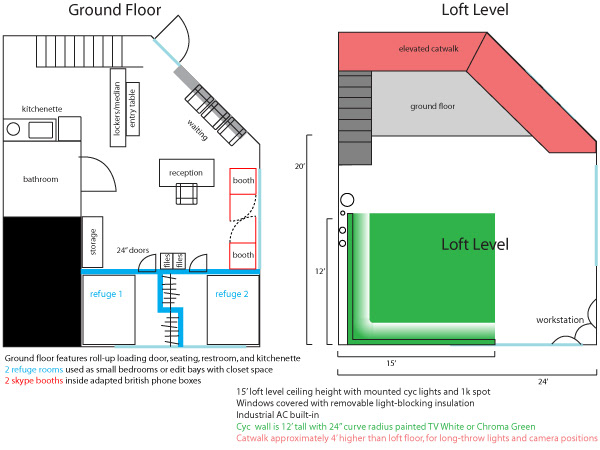
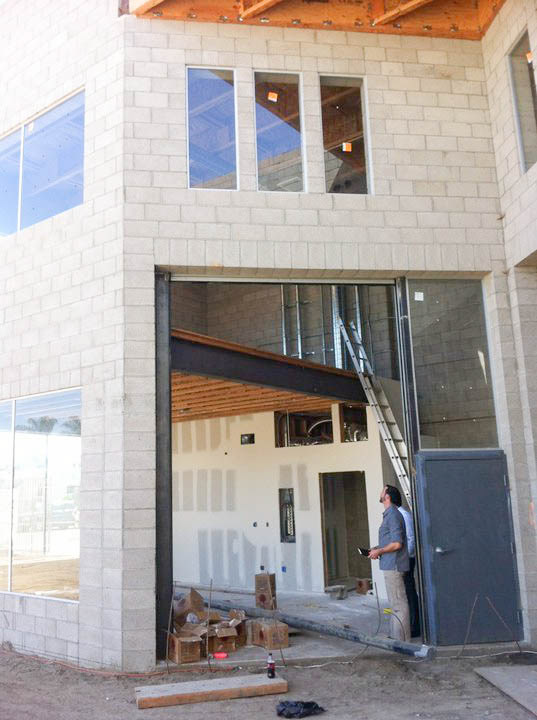
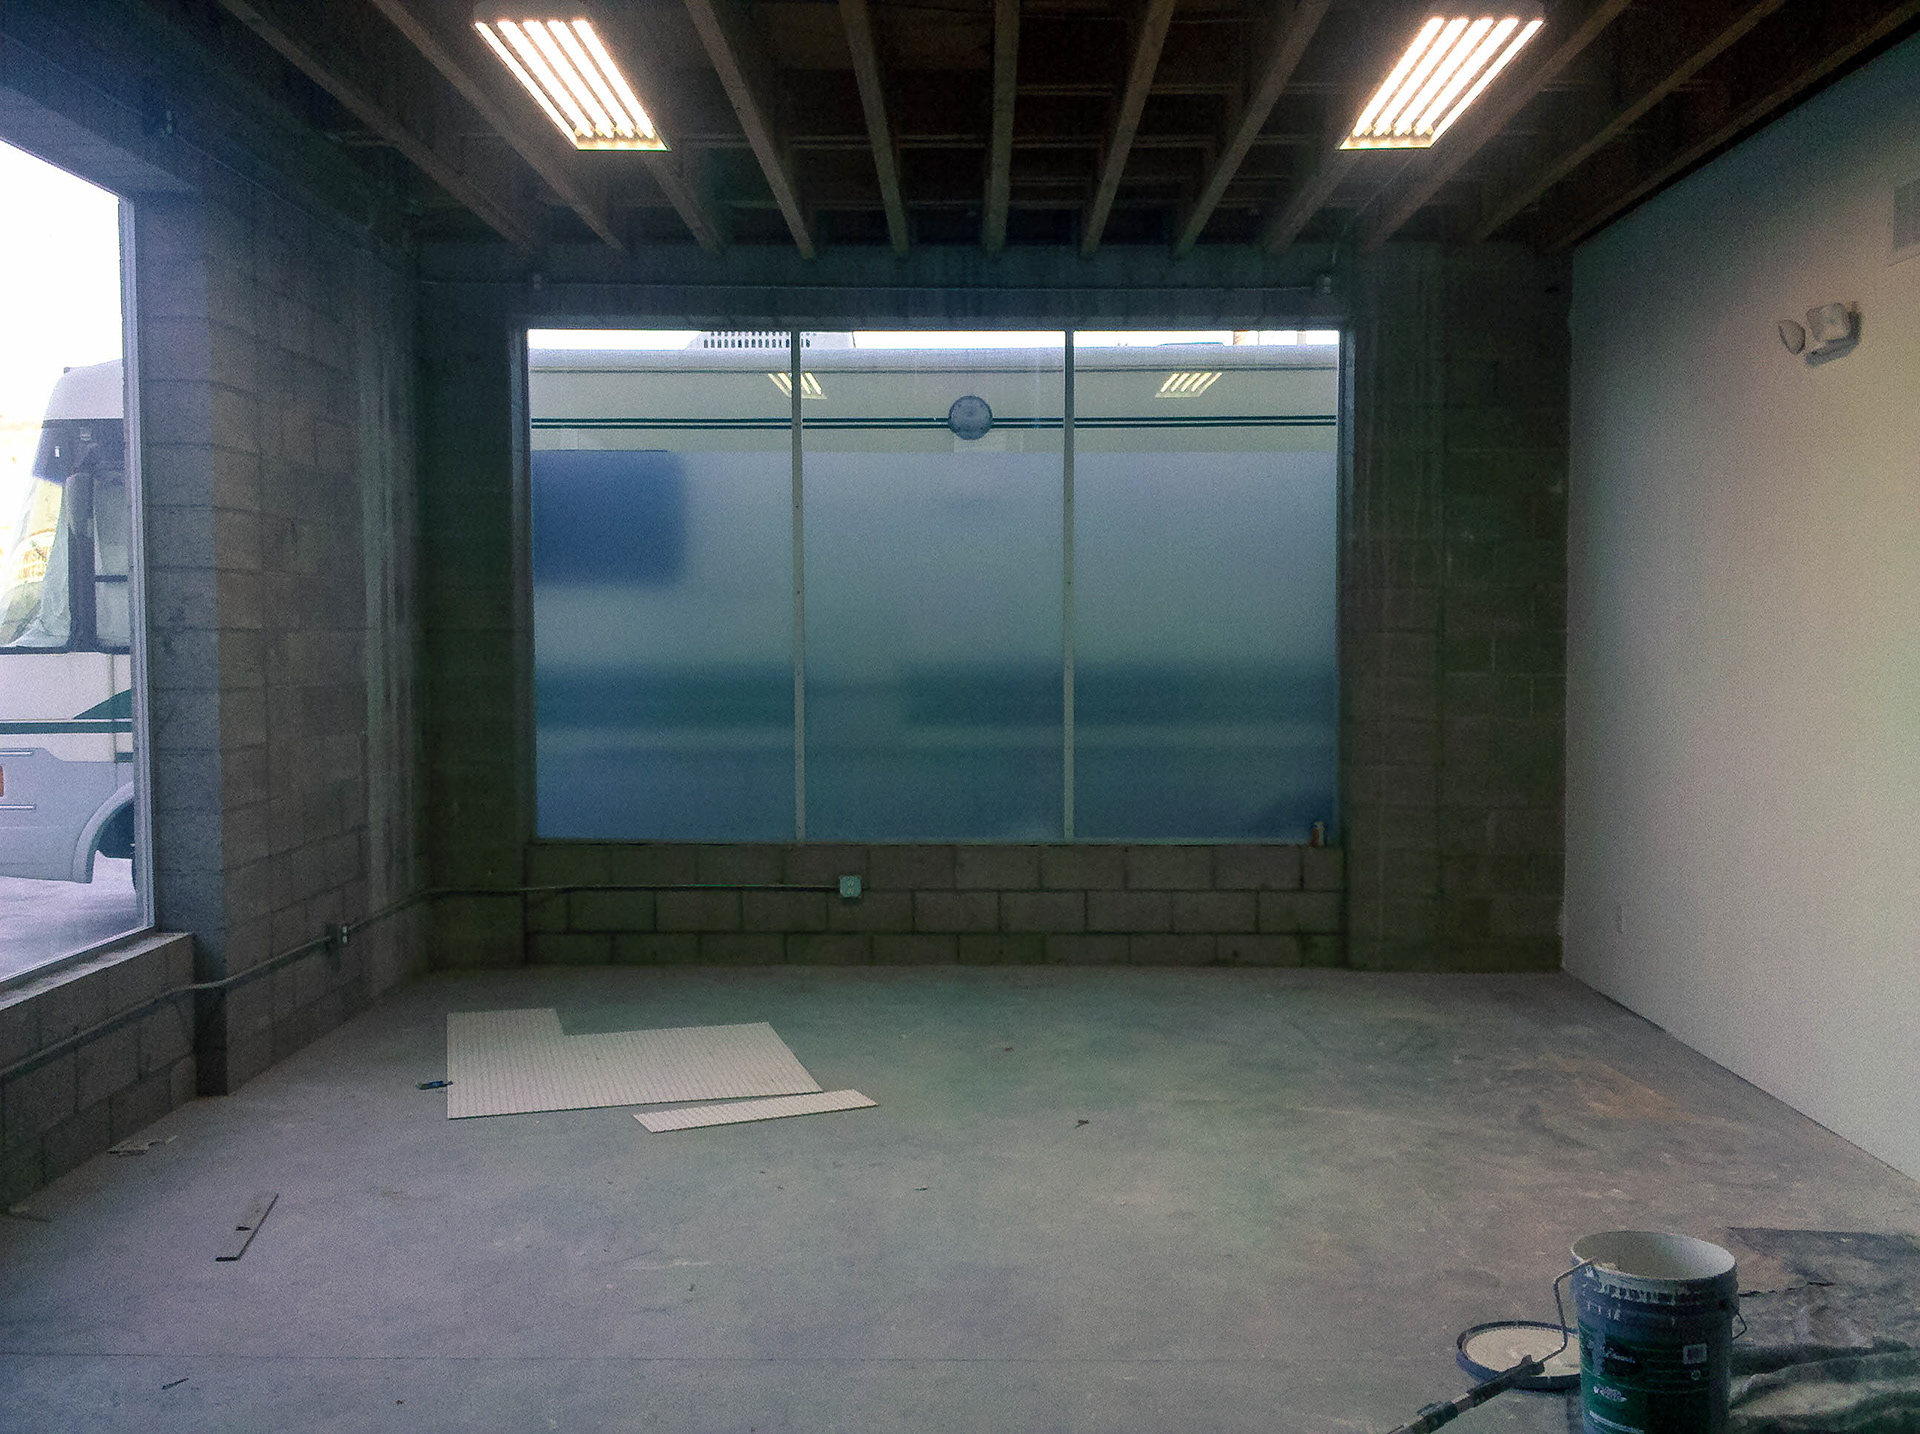
Transforming a relatively small warehouse space into a functional lofted video studio was an exhaustive effort. As you can see below, it was initially little more than an oddly shaped cinder block box with a large roll-up door, an unfinished bathroom, and an inaccessible lofted mezzanine. Above, you can see the final floor plan that I would construct after designing and rethinking it for maximum efficiency at least 30 times.


As you can see above, the good news was that there was an already present industrial HVAC unit which would serve nicely to keep the studio cool when running a lot of hot lights.
The open area under the loft downstairs was where I would build sleeping quarters for the owners which could double as edit bays when they were staying elsewhere.

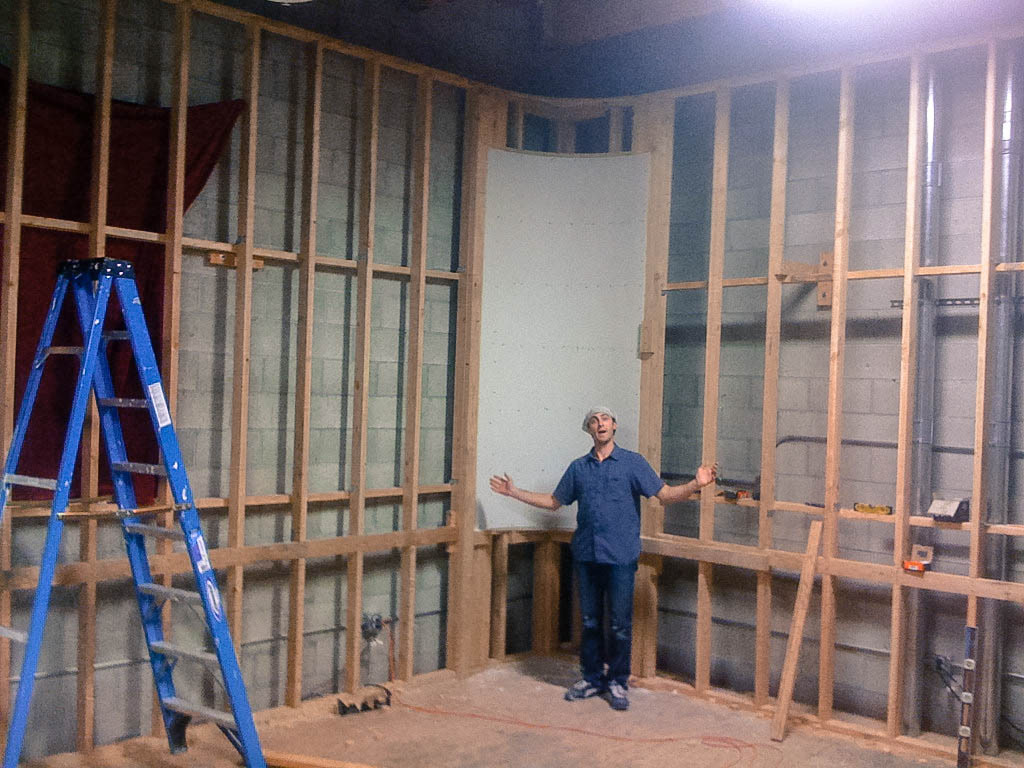
The front wall was built first and then the zig-zaging center walls were constructed to divide the space in half. This dividing wall wrapped around the window sill and came all the way up to the glass window, forming a good seal between the two rooms without removing or altering the glass.
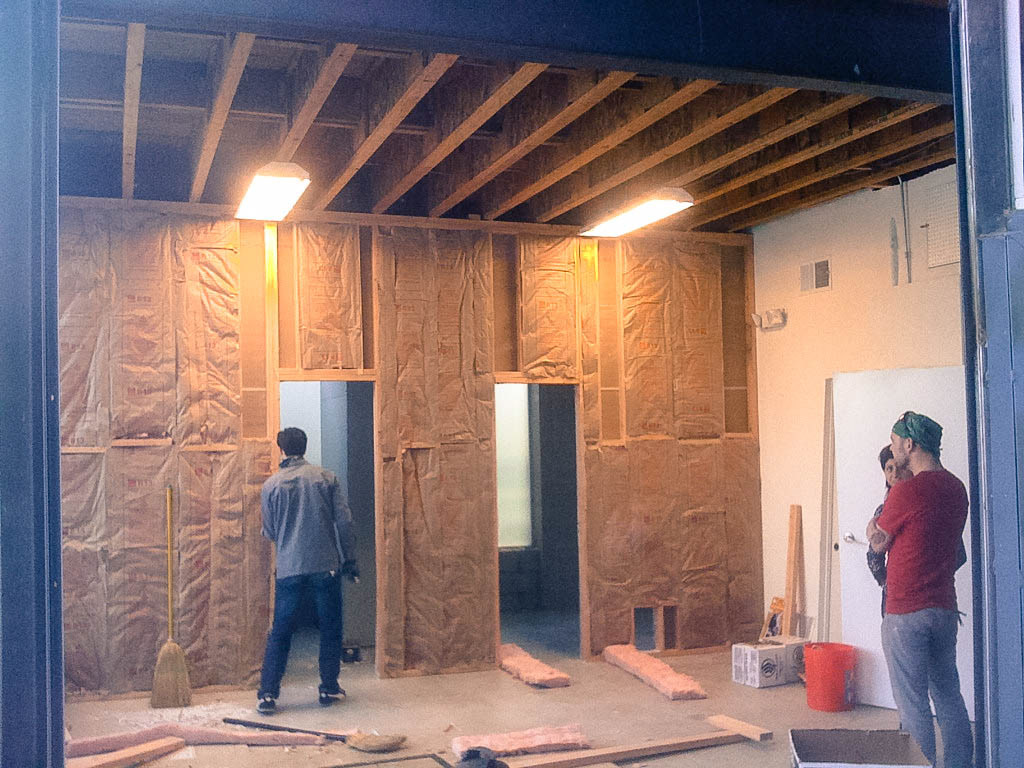
These rooms recieved fiberglass insulation lined with dense sound deadening sheets on the inside to reduce any noise bleed between them and the rest of the open loft space so that editing would not disrupt production (at least when it was at low volumes).

Sheetrock was installed inside and out and painted to blend into the pre-existing wall.
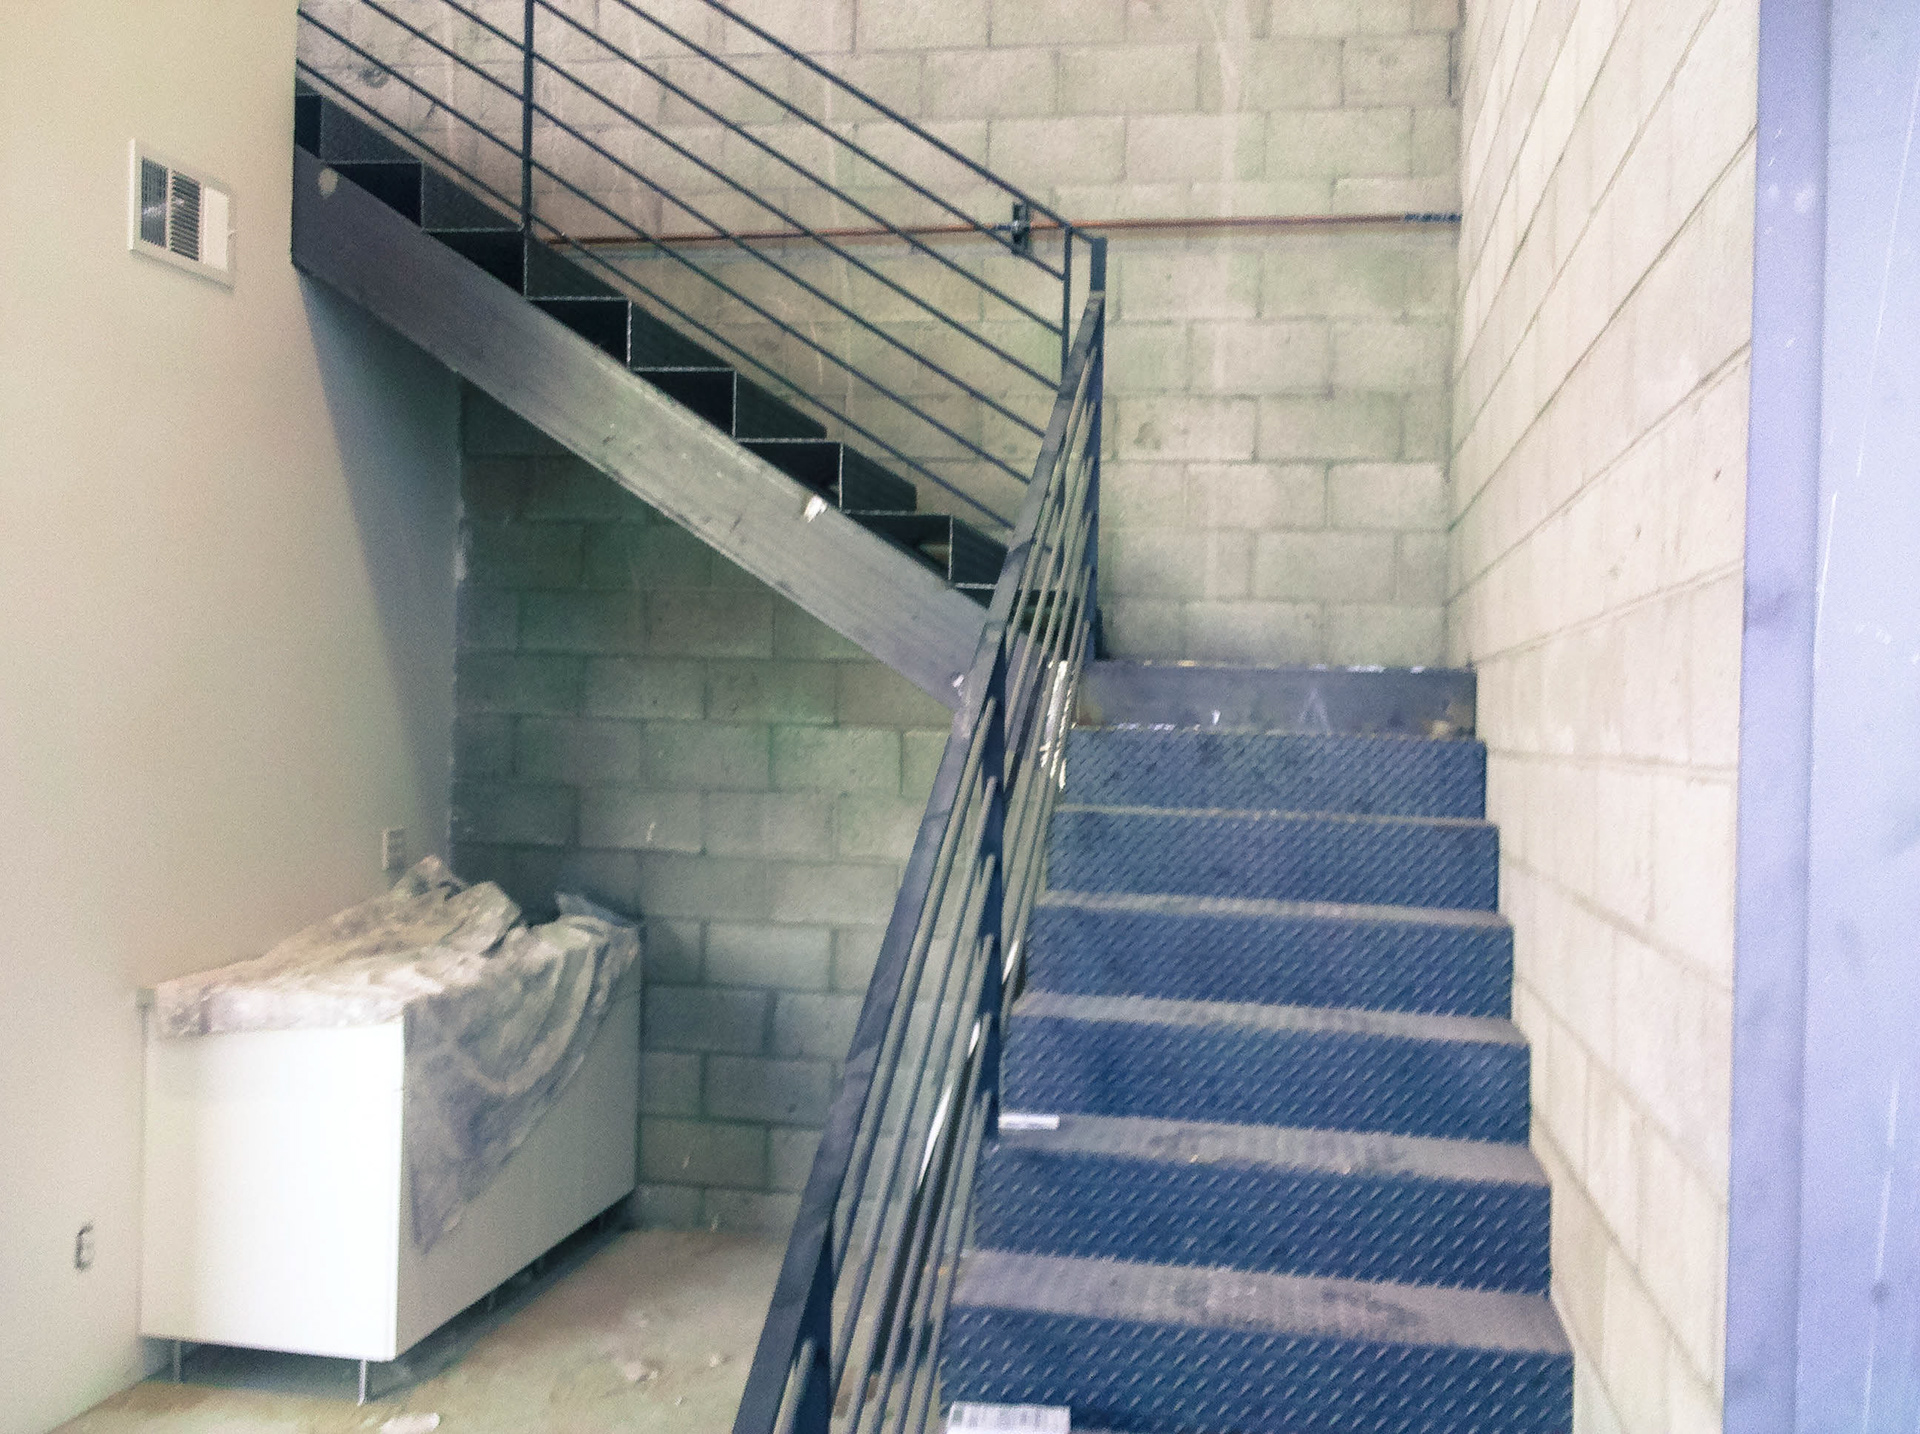
The "kitchenette" under the steel staircase left something to be desired since it only offered a built in electric stove and sink with a few cupboards underneath.
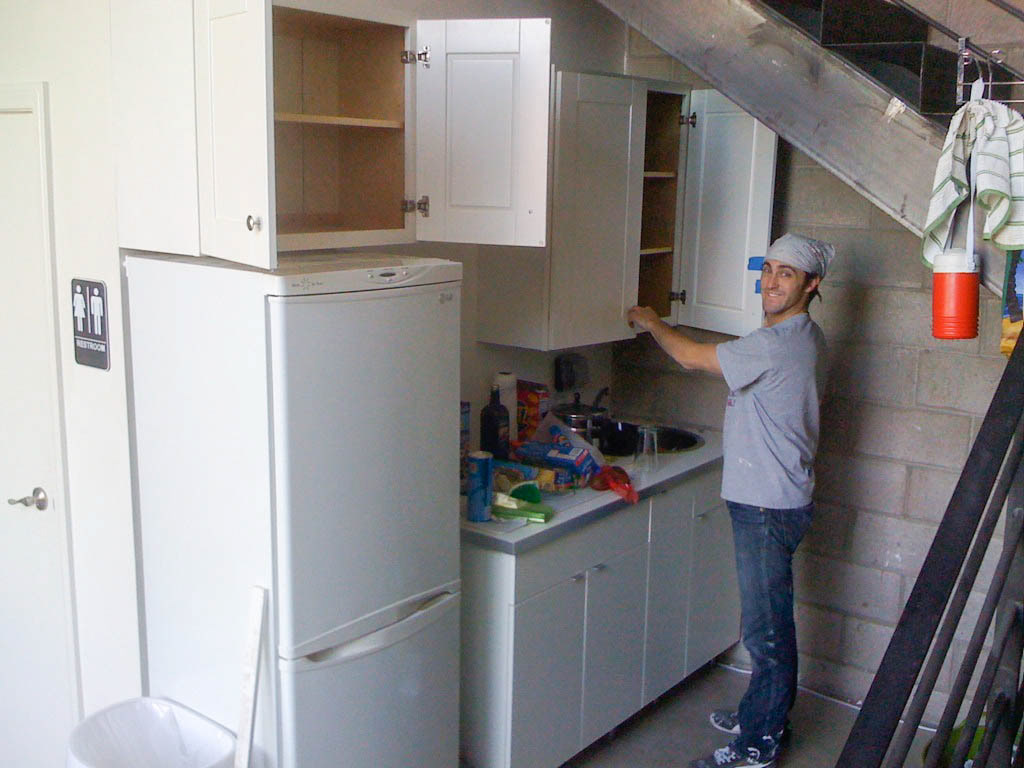
With the addition of some wall-mounted cabinetry and an oddly sized fridge to fit the oddly sized space left at the end of the counter it started to look more fucntional.
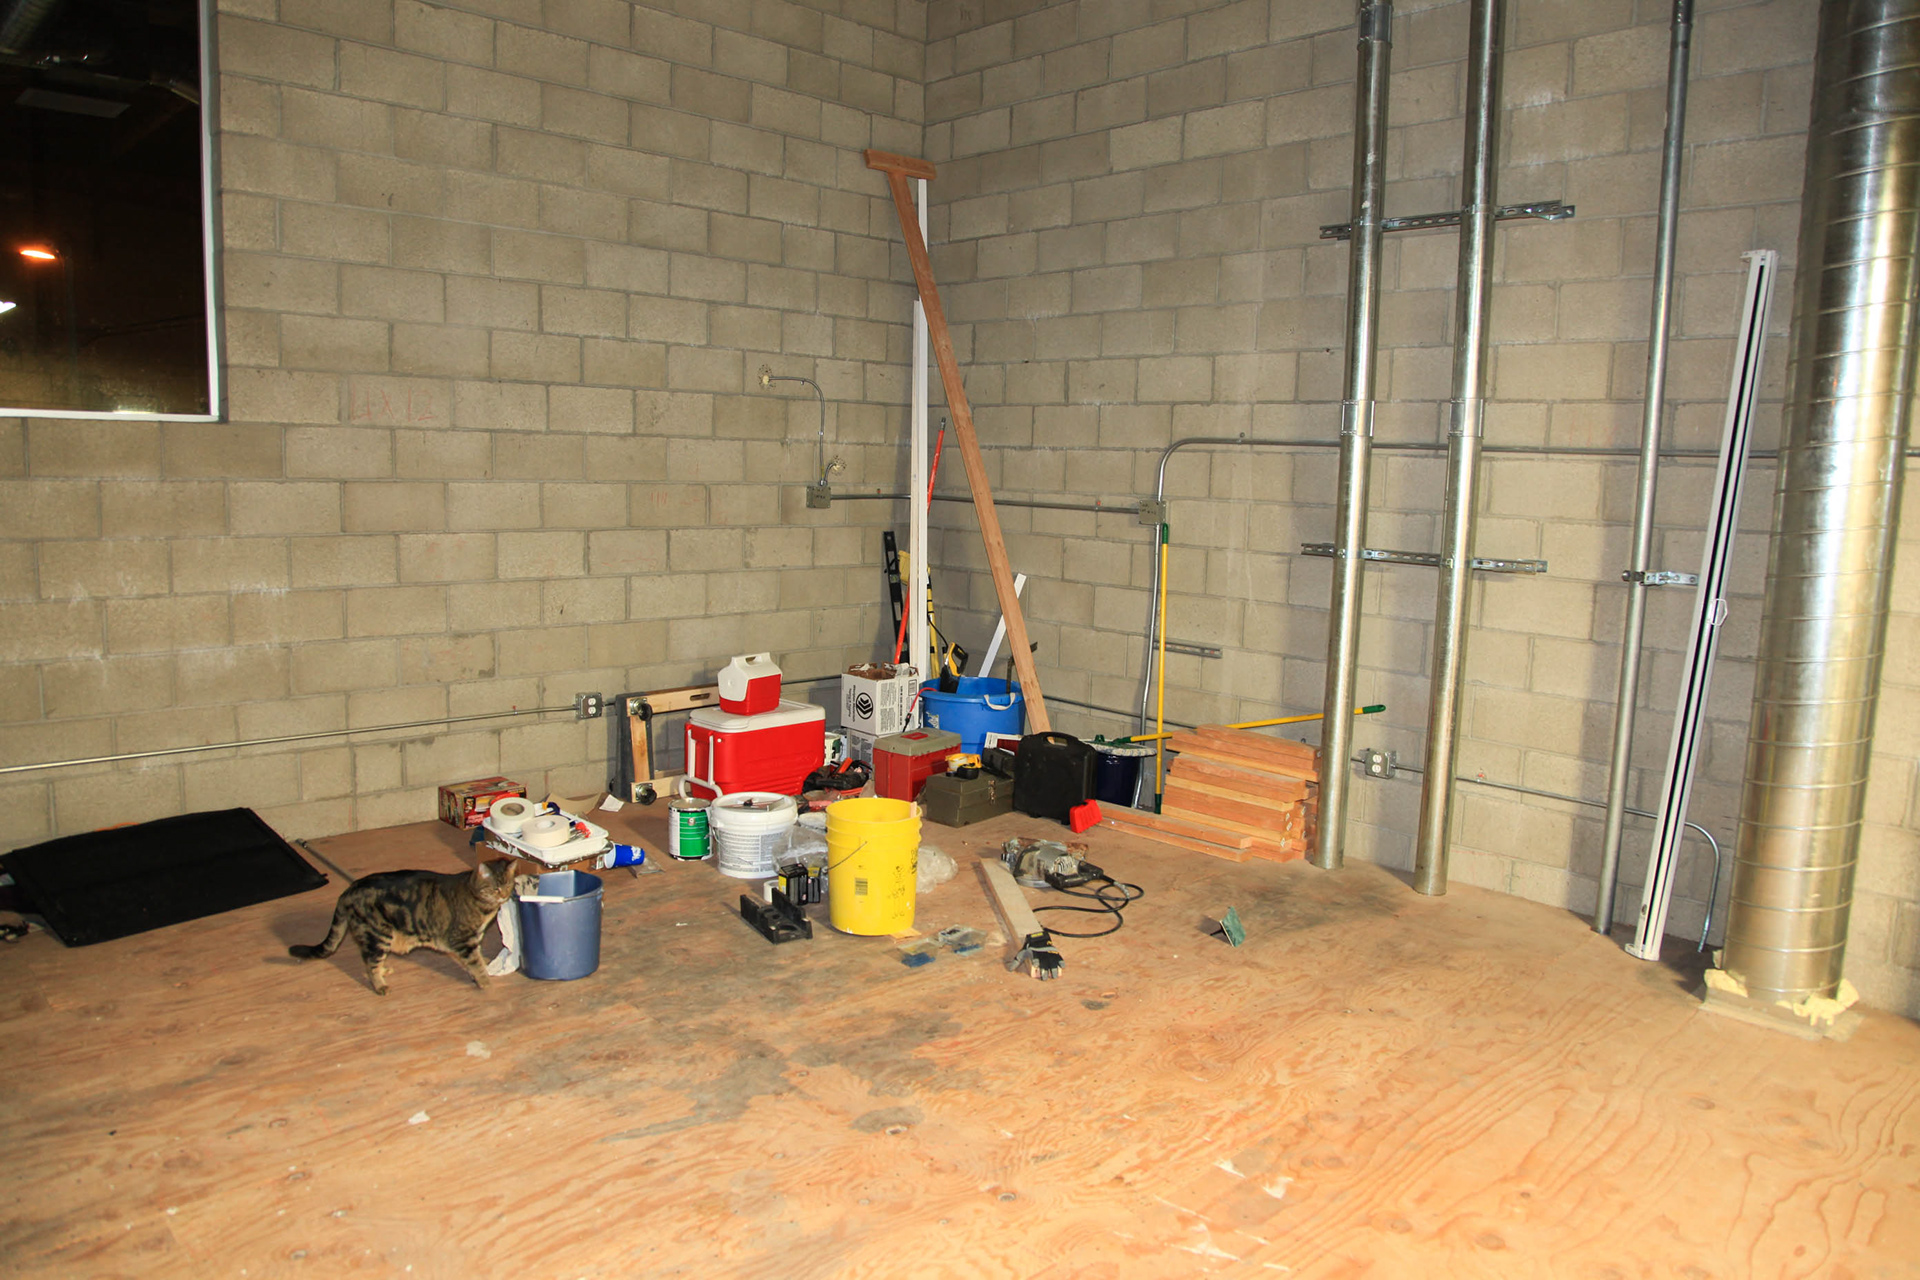
The mezzanine area offered little more than plywood floors with a lot of exposed pipes and ducts. It was a pretty blank canvas but it would take some creative problem solving to turn it into a functional cyclorama studio.
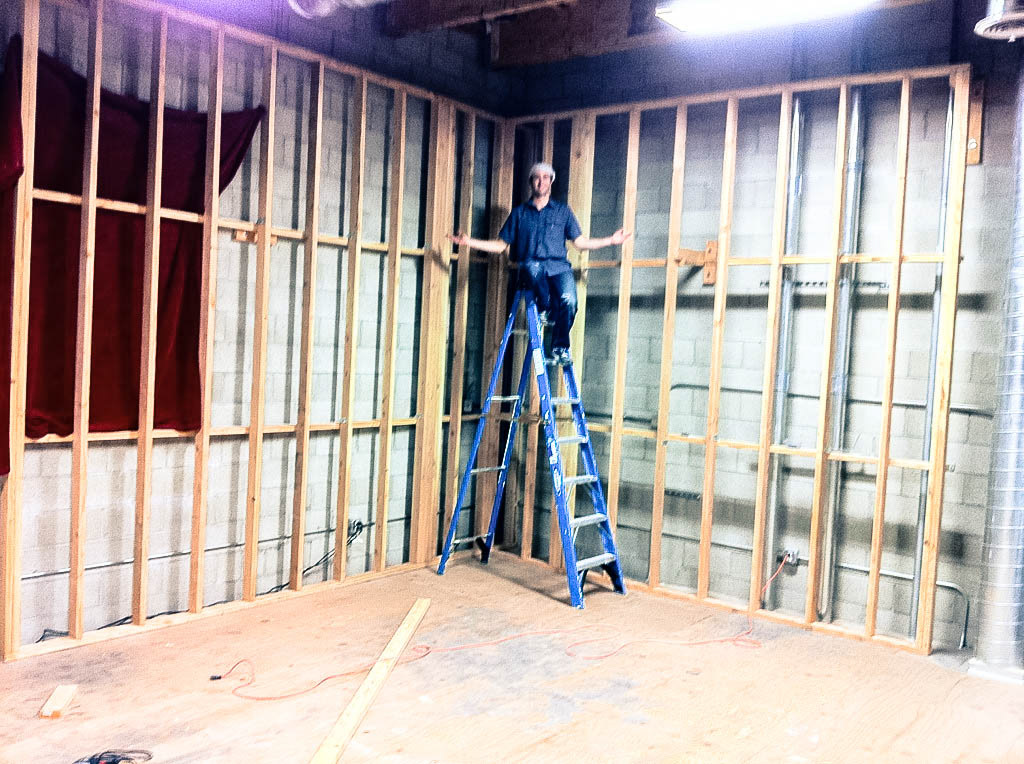
I built traditional stud walls a few inches away from the cinderblock walls of the structure with supports extending between the two, bolted to both. There was just enough room for a thin person to squeeze behind these walls in the event that they needed to retrieve a component (or a cat).
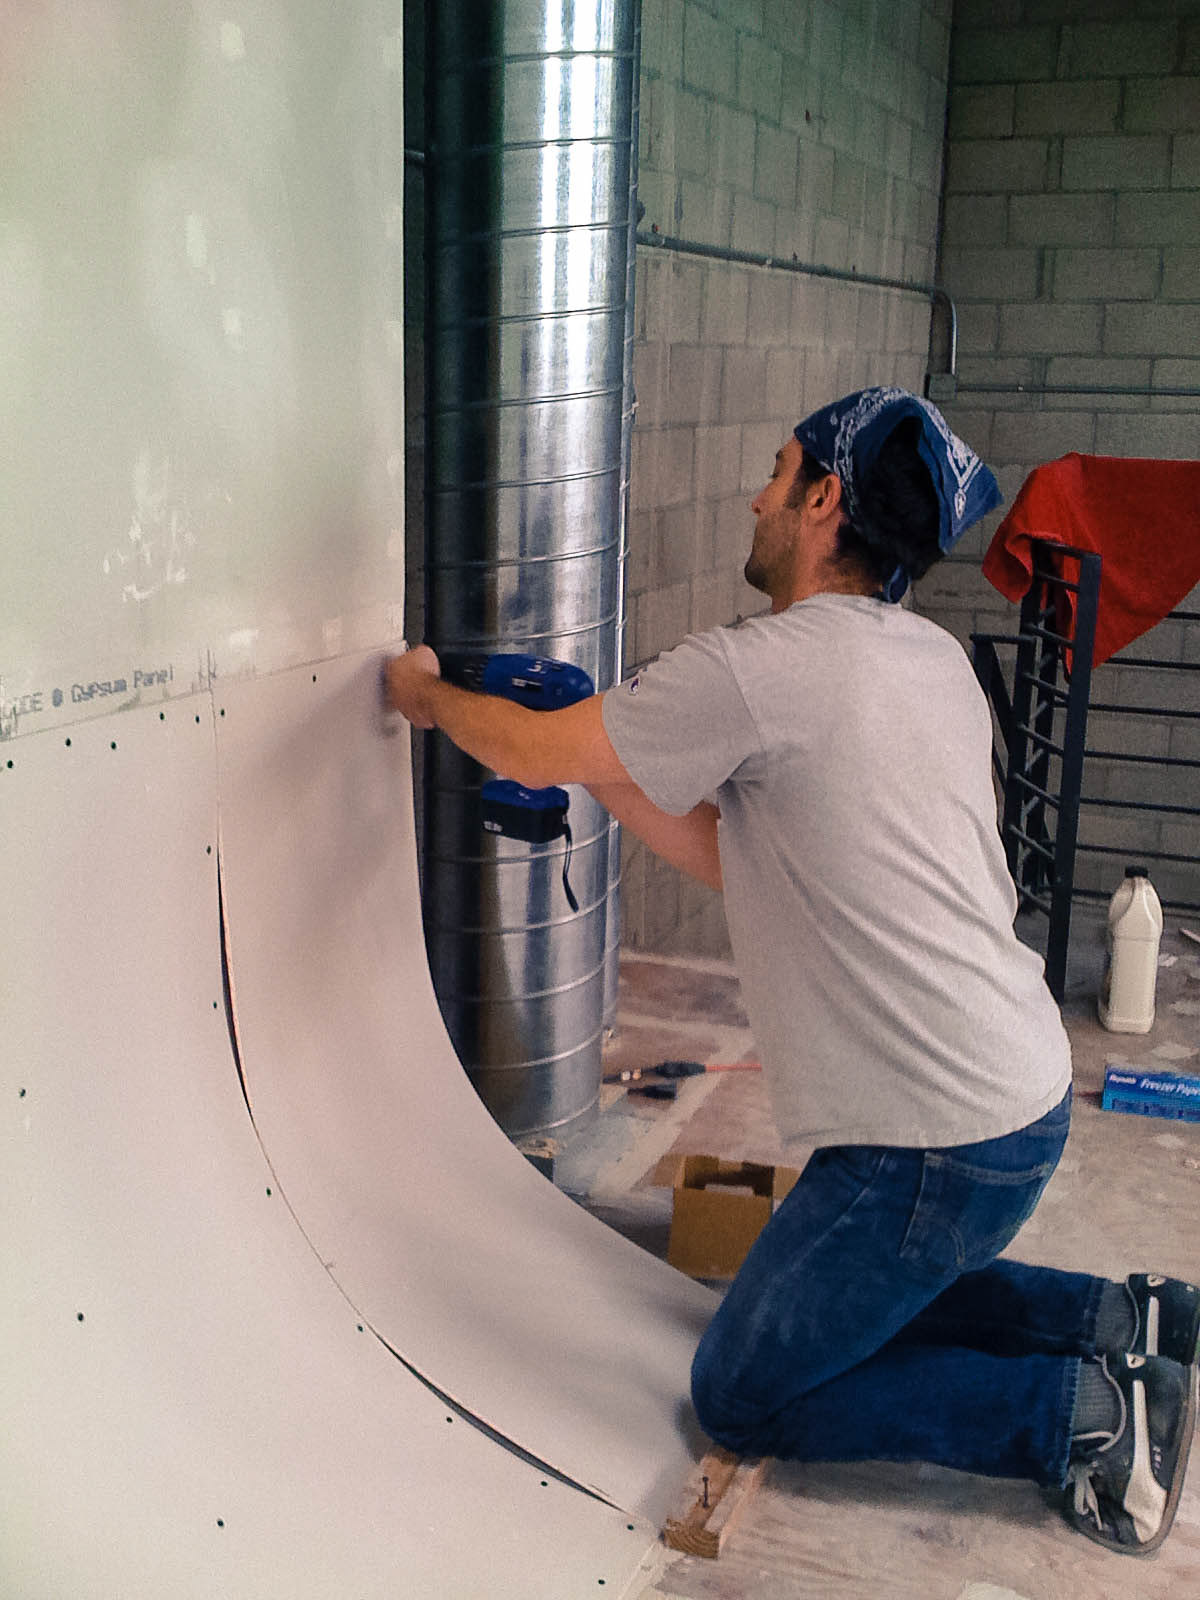
One of the toughest parts of the construction of this cyclorama was the back corner. I cut the same 24" radius ribs (which you can see below) but had to mount them vertically and bend a sheet of 1/4" sheetrock across them, screw it into place, and then layer a second sheet of 14" sheetrock over the first. Bending sheetrock without breaking or cracking it is never a particularly easy ordeal but doing it vertically (without the help of gravity) is really challenging.
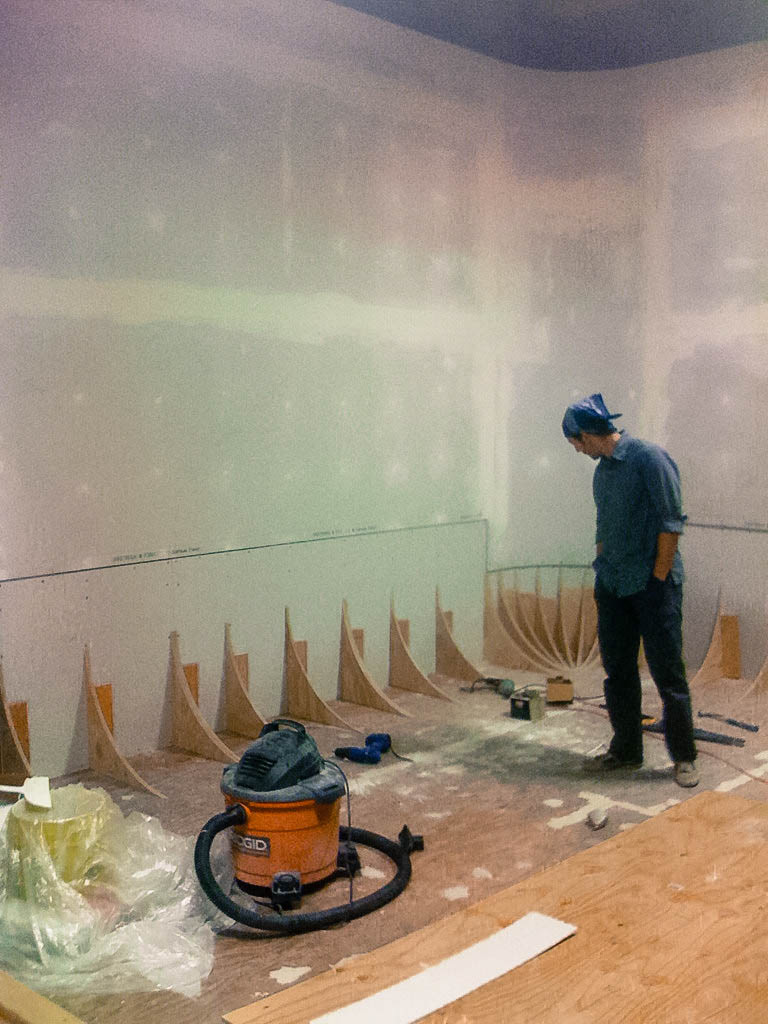
The 5/8" plywood ribs were all cut with a handheld jigsaw, taking care to keep the line as smooth as possible. In the corner they are arranged in a dome-like configuration along the line of the already completed curve connecting the 2 walls.
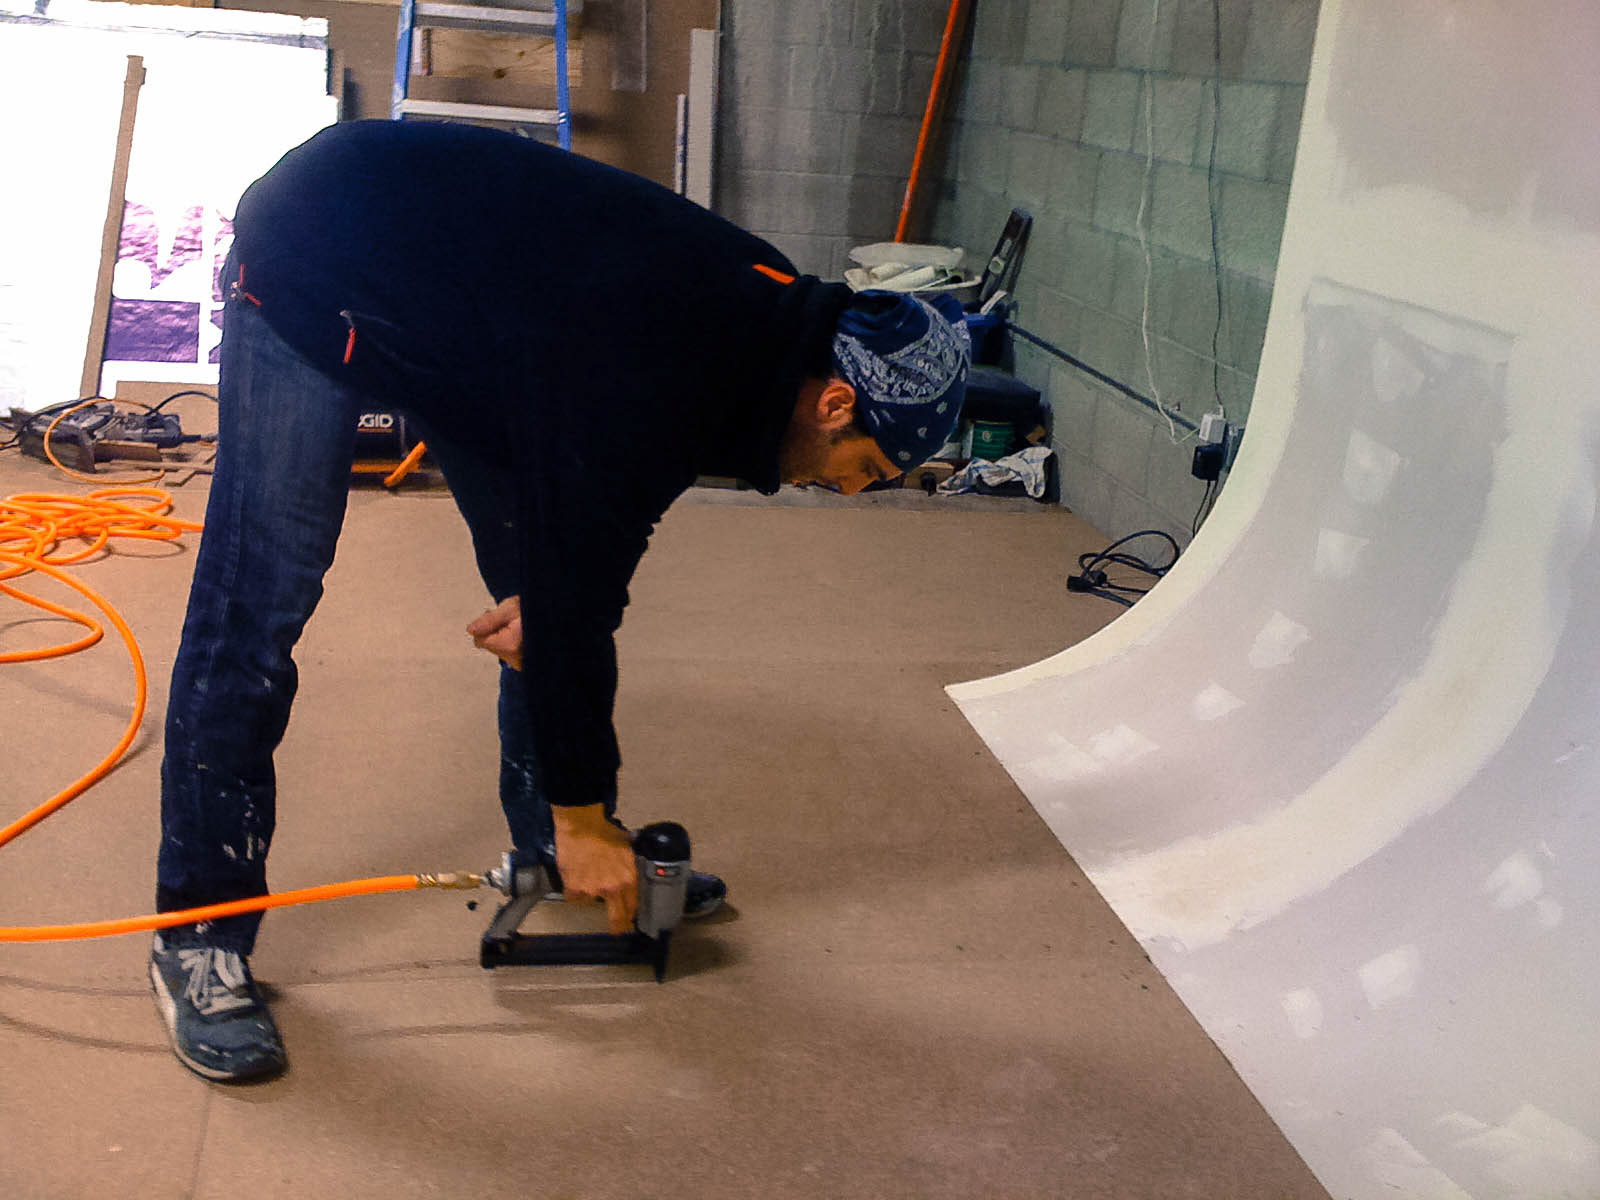
Under my knee you can see the piece of wood screwed to the floor which holds the edge of the sheetrock in place while it is being affixed with with more screws along the curve of the ribs.
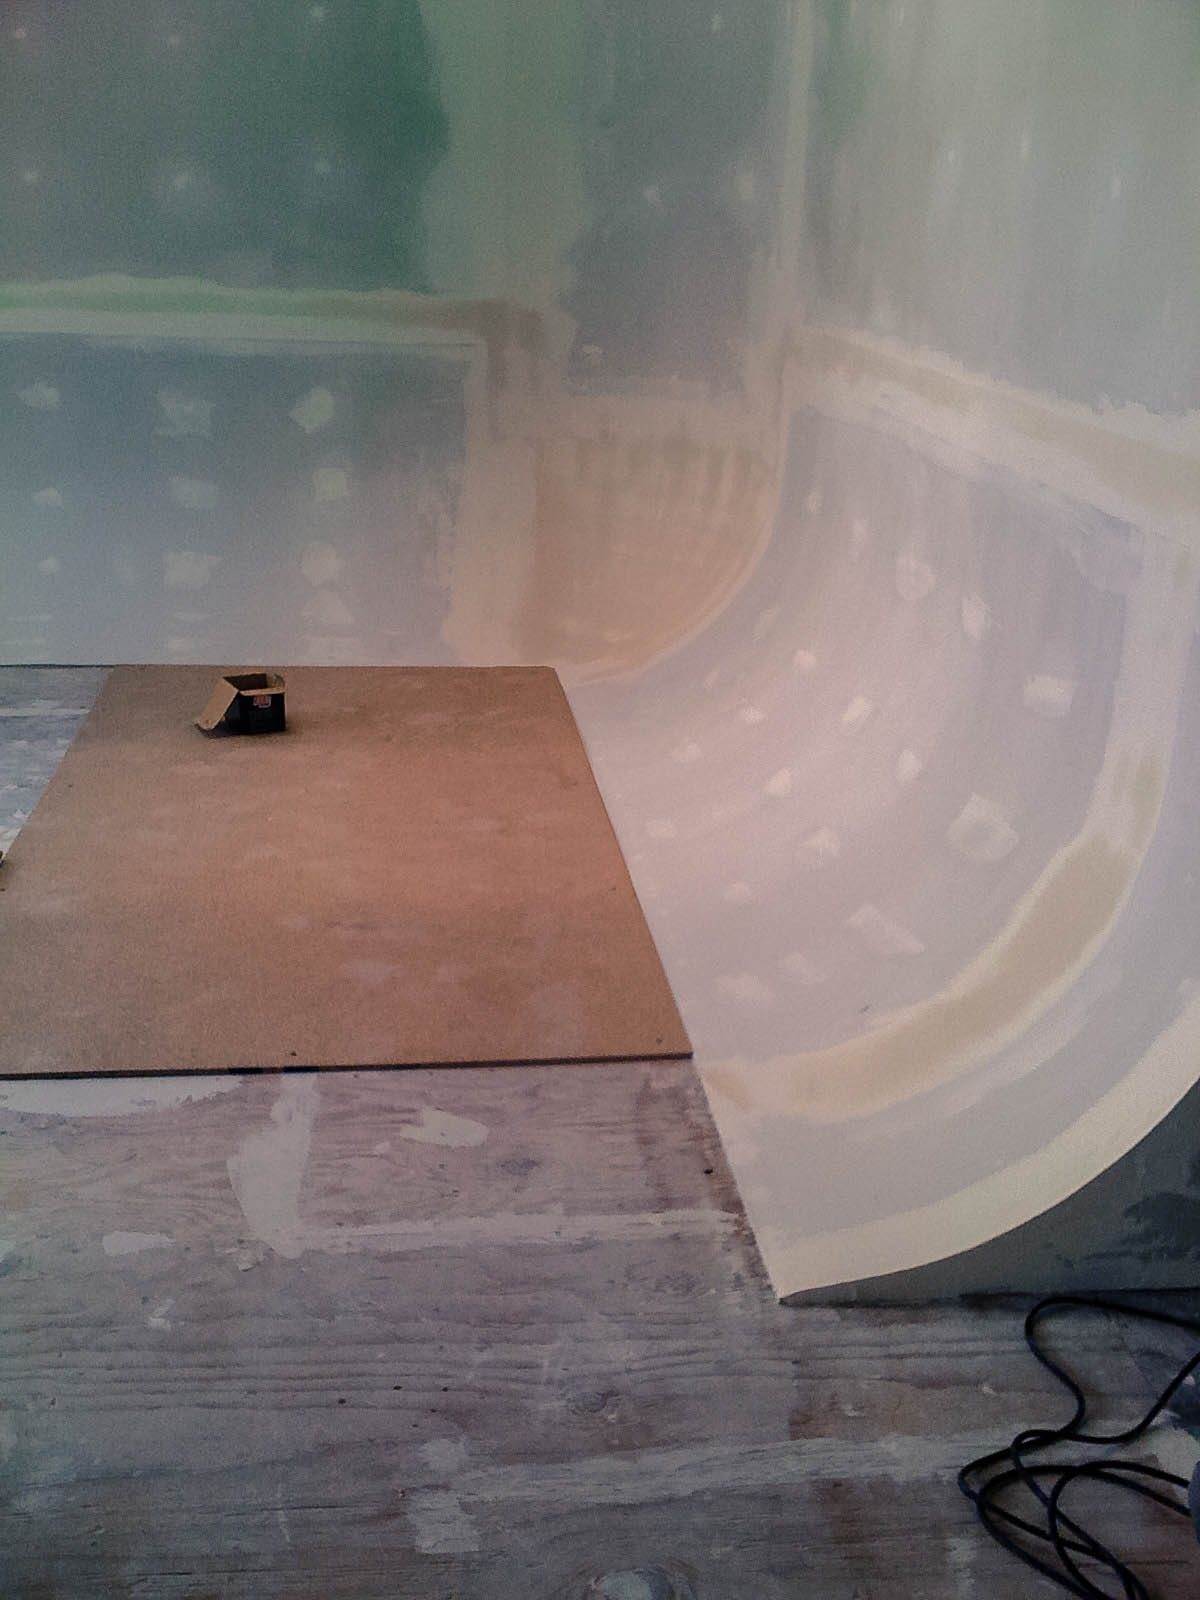
Every divot and gap had to be generously smoothed out with 2 coats of carefully sanded joint compound. Once all the dust had been vacuumed away, it was time to start installing the second layer of flooring which, as you can see above was accounted for by letting the cyc curve end just high enough to meet its level.
These thick sheets of masonite were easy to install with a pneumatic stapler. They never moved and the staples did not come up for years. It provided an extra layer of sound deadening which virtually eliminated the "clickety clackety" noise that footsteps often make on concrete cyclorama stages while removing the boomy percussice noise of walking on a hollow wooden floor.
The other advantage of the second layer of flooring was that it was made from an incredibly smooth material. I smoothed out all the divots and joints using a very hard surface repair compound that would stand up to a lot of foot traffic.
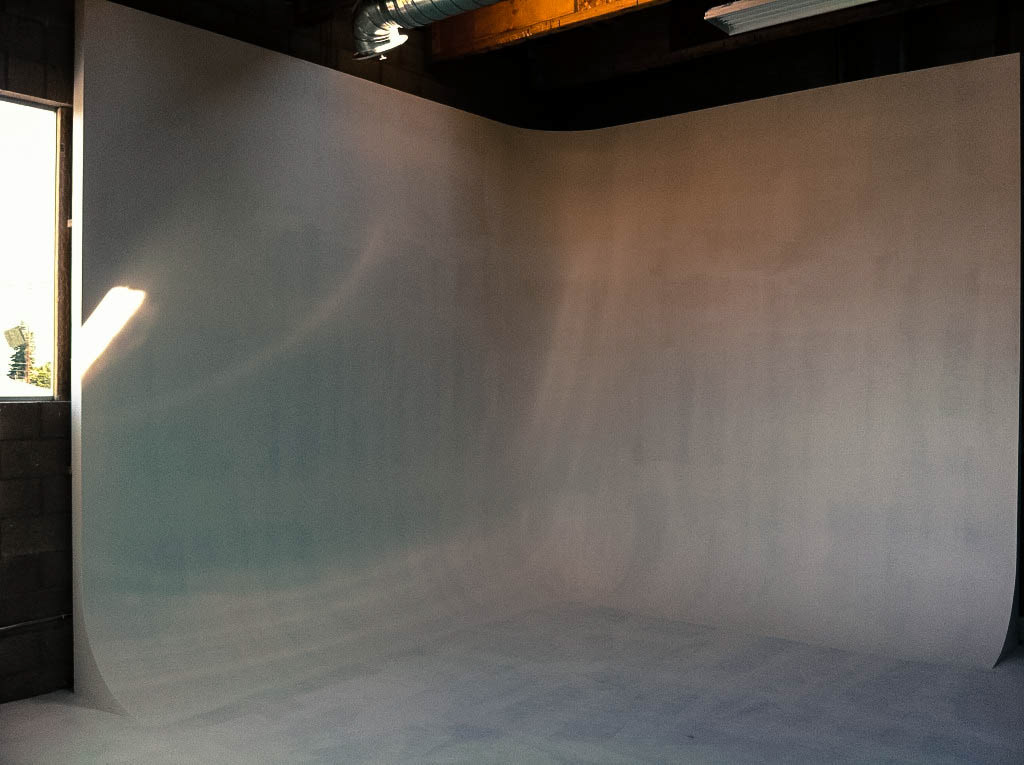
With a layer of primer on the walls and floor it was starting to look like a real studio.

I had a lot of scraps left over from building the cyclorama so I used them to build some shelving and a desk that could function as a stand-up worksatation or edit bay.

I gave the workstation a coat of TV white to match the cyc wall. I over-engineered it a little bit with removable shelves and over-built supports for the table top which would support the weight of at least 5 people standing on it. I even stood on the floating wall shelves on the sides a few times and they felt like they would support a few more of me.
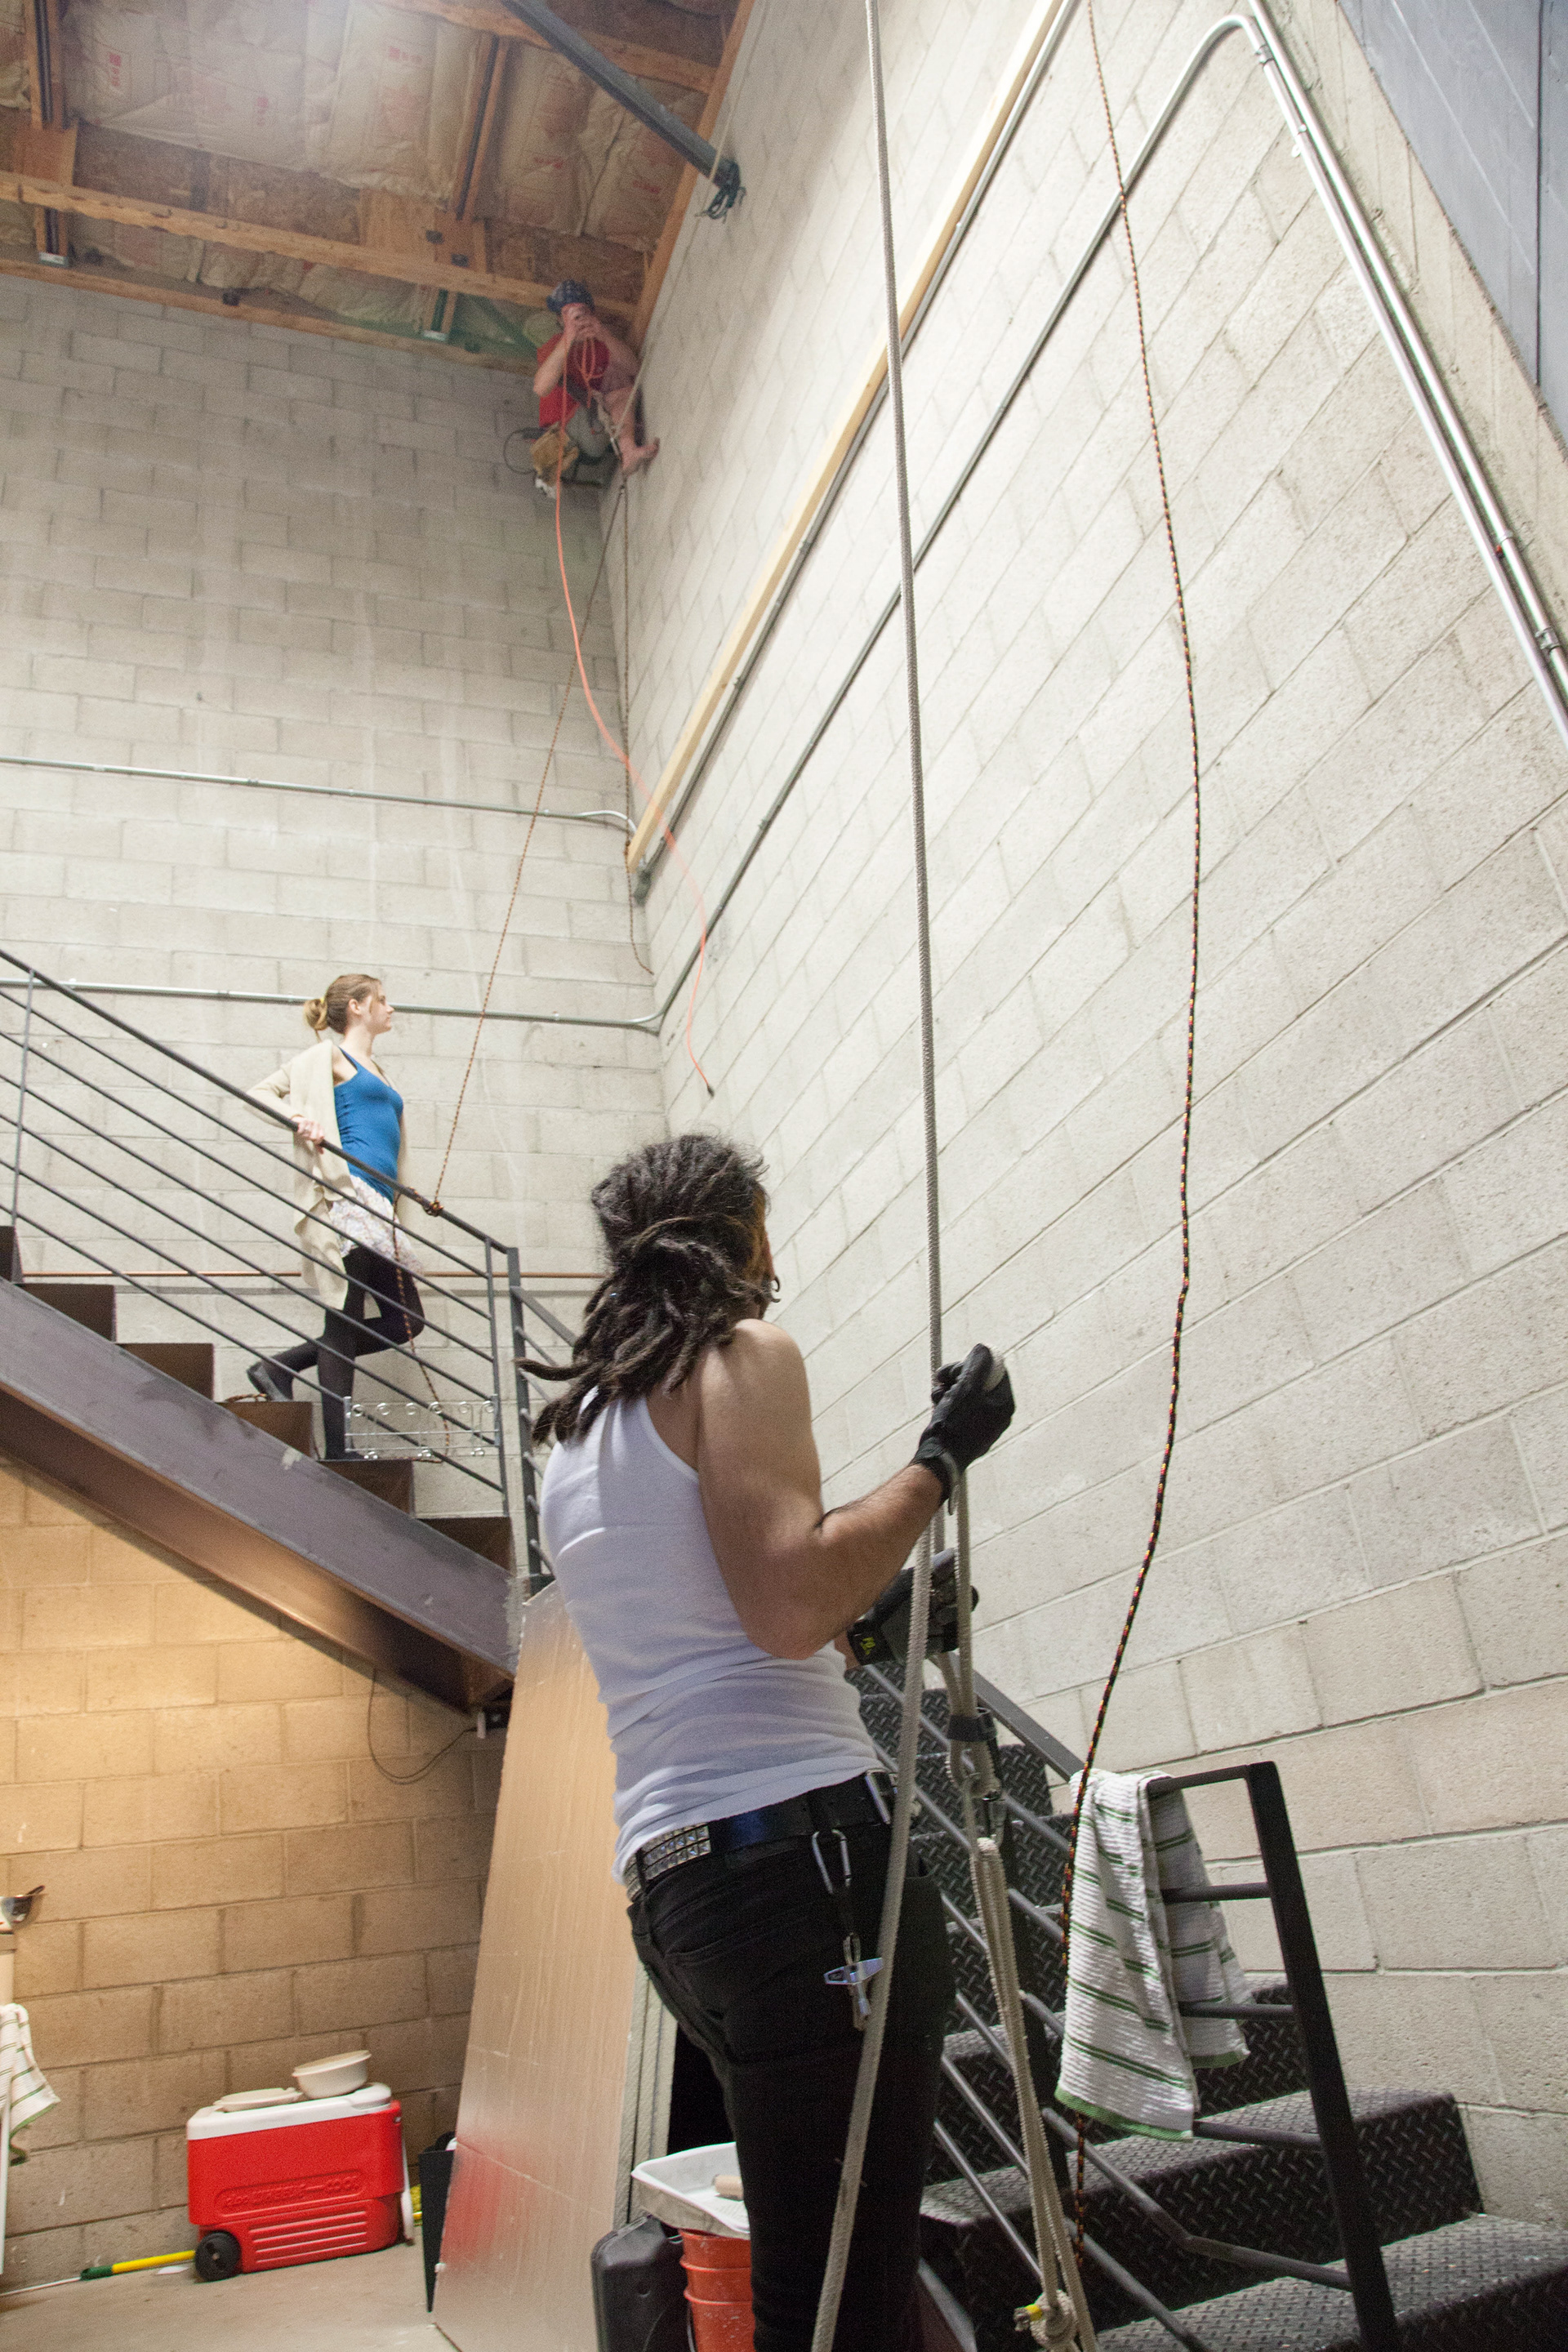
No, that's not spiderman up in the corner of the ceiling. It's me. I had to free-climb around the edge of the ceiling in order to set top-rope anchors so I could be on belay while constructing the floating "catwalk" platform 20 feet in the air.

2x4 planks were bolted (painstakingly) along the wall using 2,500lb sheer strength bolts every 18" to ensure that the platform would have a secure foundation.
I built the frame of the platform in 2 sections that would join together at a 45 degree angle in the corner and raised them each into position using ropes and pulleys.

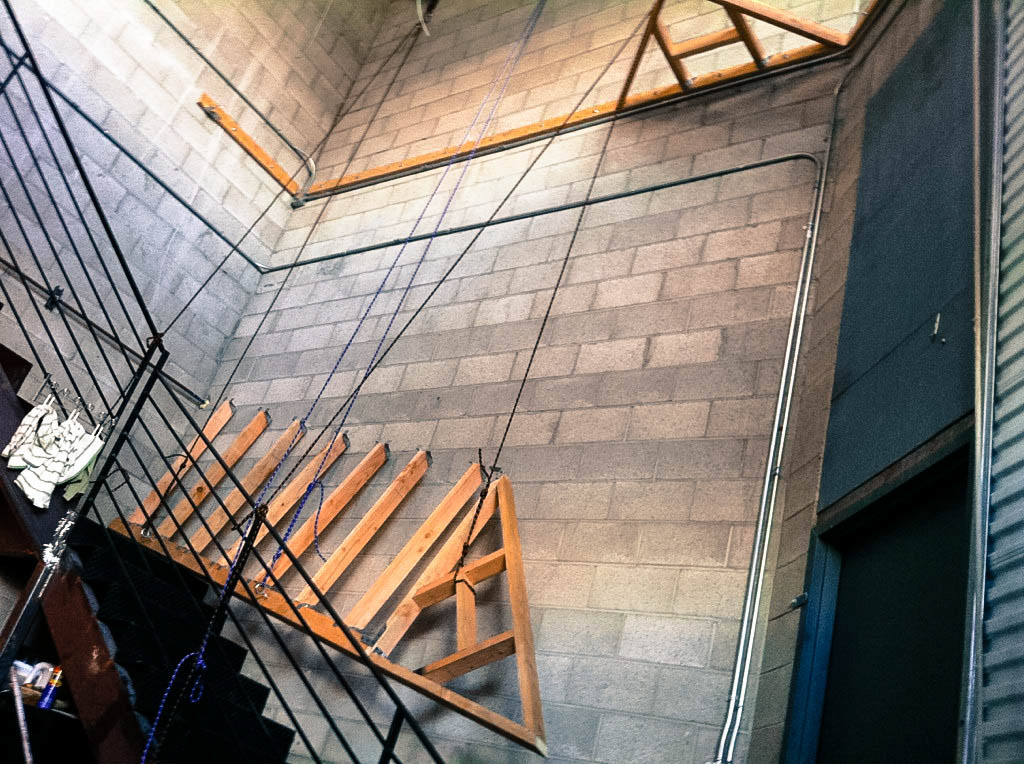
Once in position, the ropes were tied off to hold the platform steady while I rappelled around the structure with a hammer and a drill, securing the metal stud hangers to the planks that were already bolted to the wall. 3,000lb rated cables connect the outer edge of the platform to bolts already attaching supports to ceiling beams. In order to account for possible stretch of these cables, they are attached using large eye bolts which can be tightened from the bottom with a wrench.
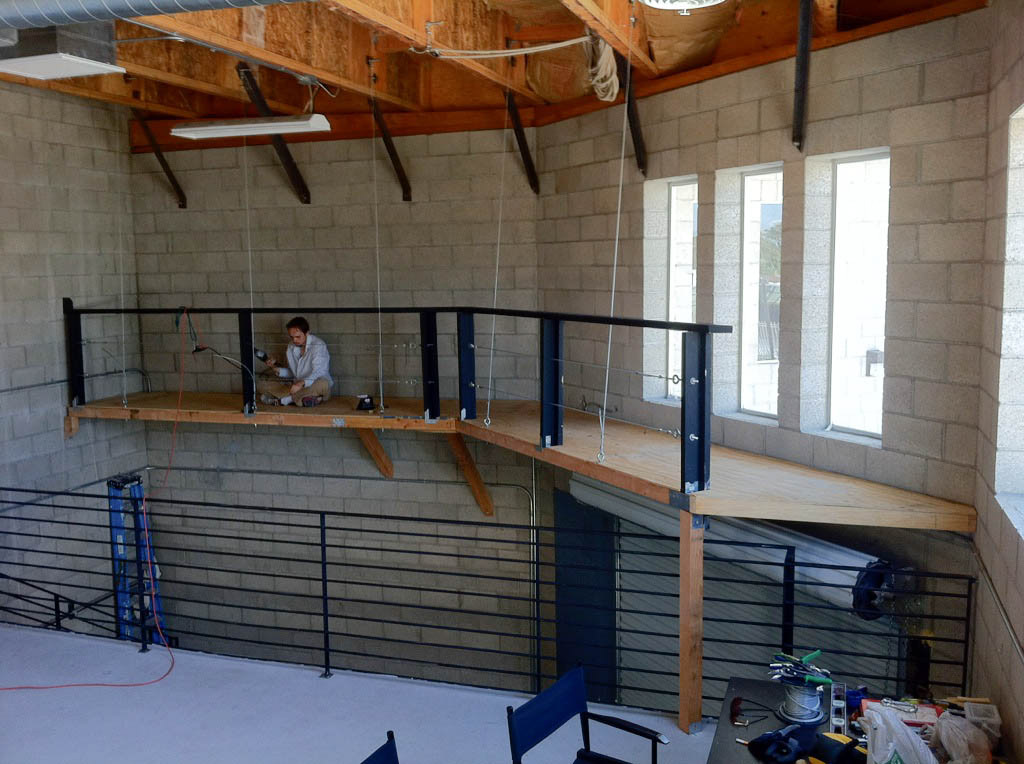
The railing is screwed to the inside and the top of the 4x4 outer beam of the platform to make it extra stable. 2 45 degree 4x4 supports were bolted to the wall near the corner to reinforce what would have been the weakest points in the floating platform's structure. It would take a LOT of pressure to move that railing and literal tons of weight to affect the structural integrity of this platform.
Similar to the floor of the cyclorama stage, the catwalk platform is double layered to reduce noise so that camera operators or gaffers can move quietly without interrupting a shoot in progress. It was all painted flat black to prevent any reflective interference with lighting.

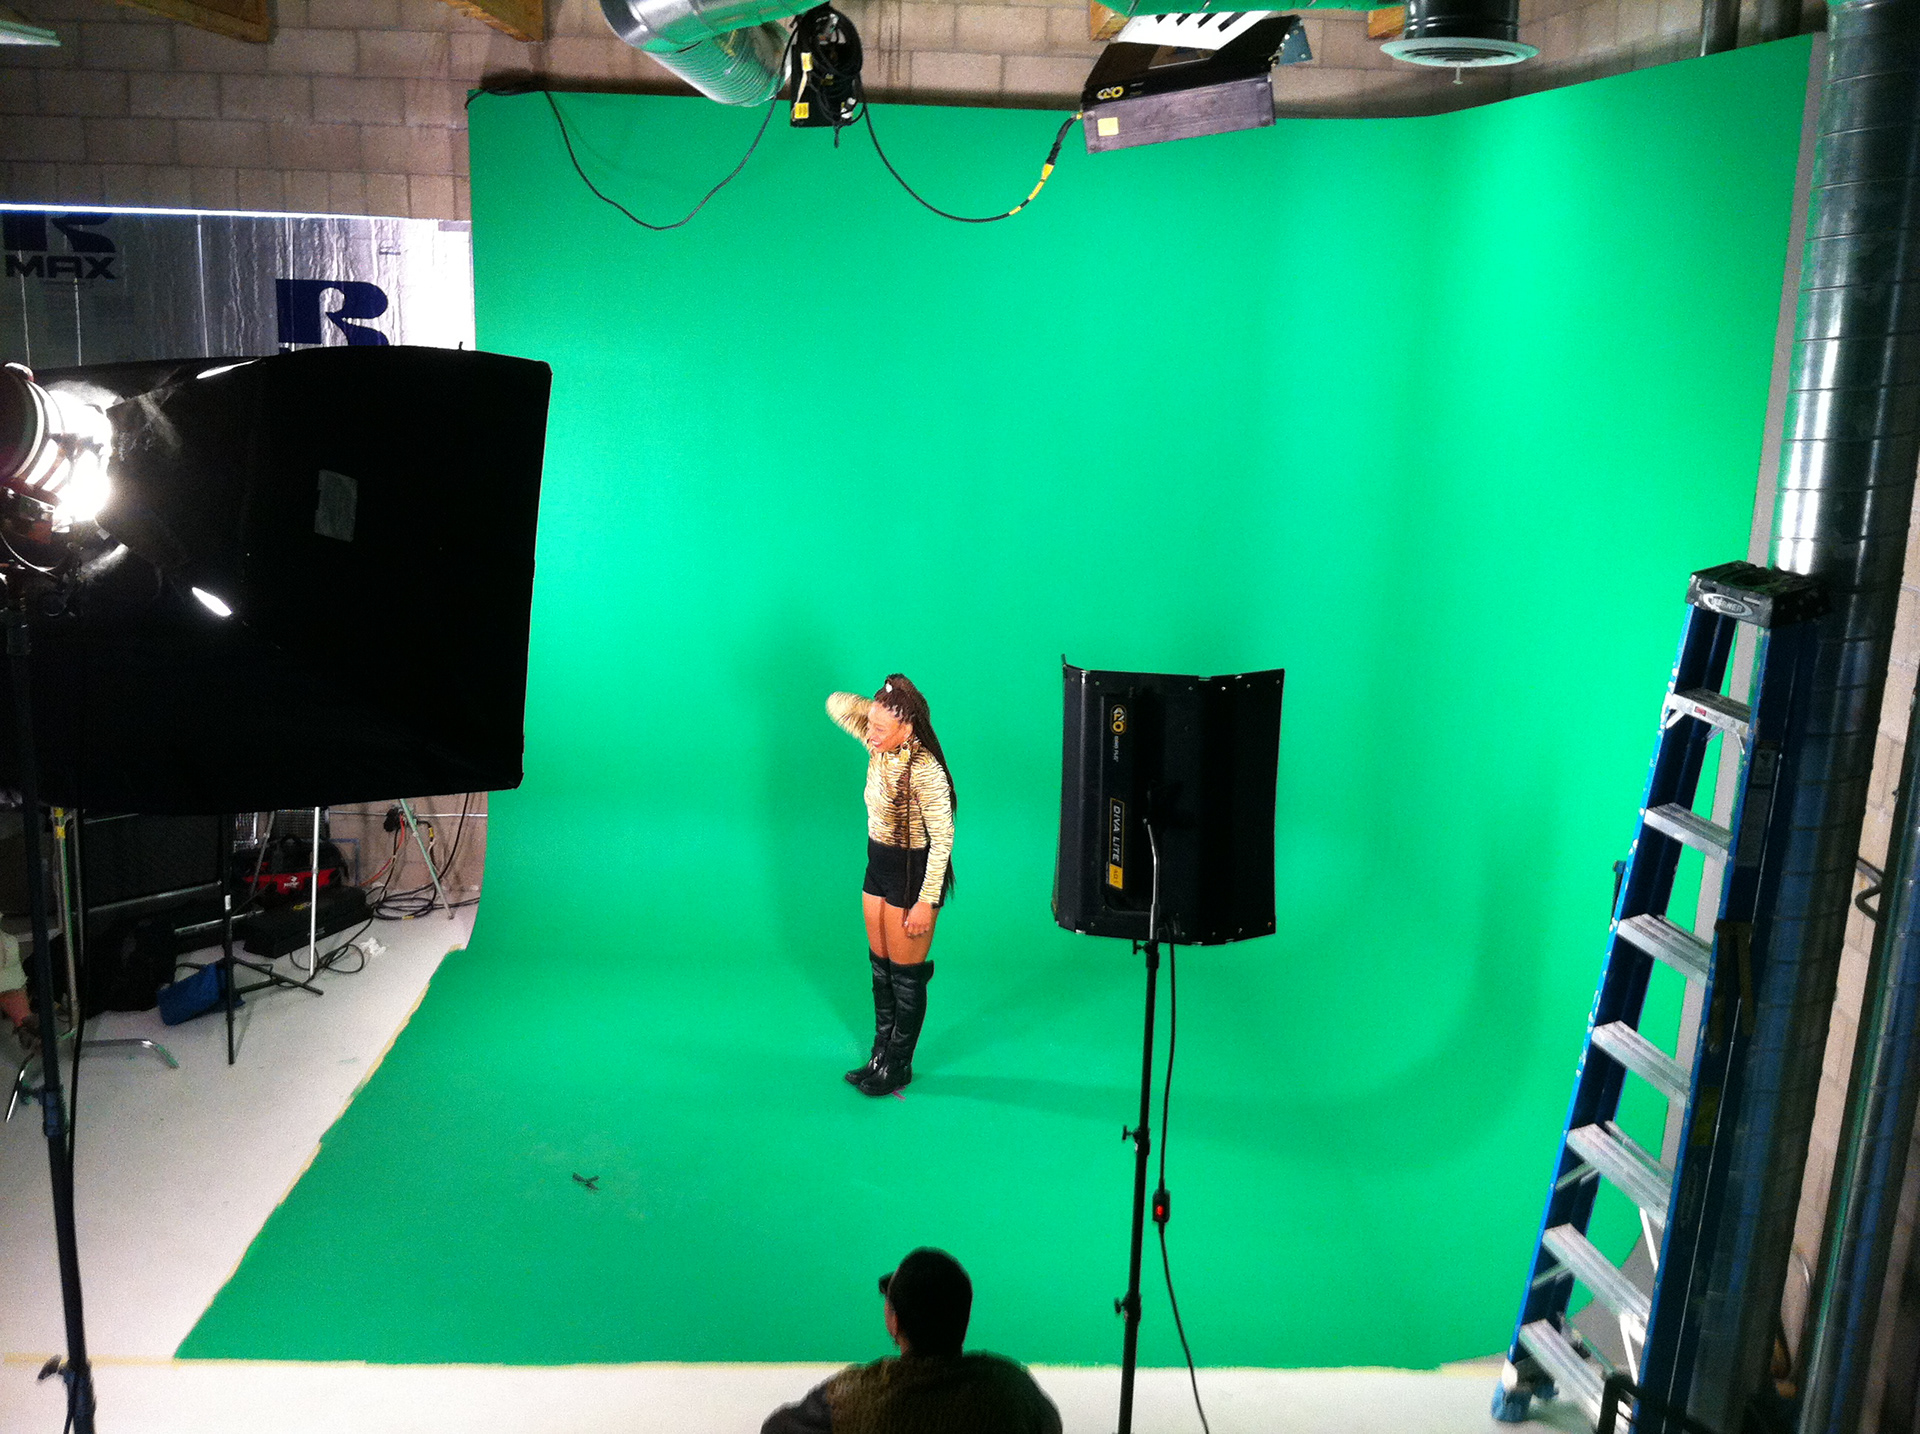
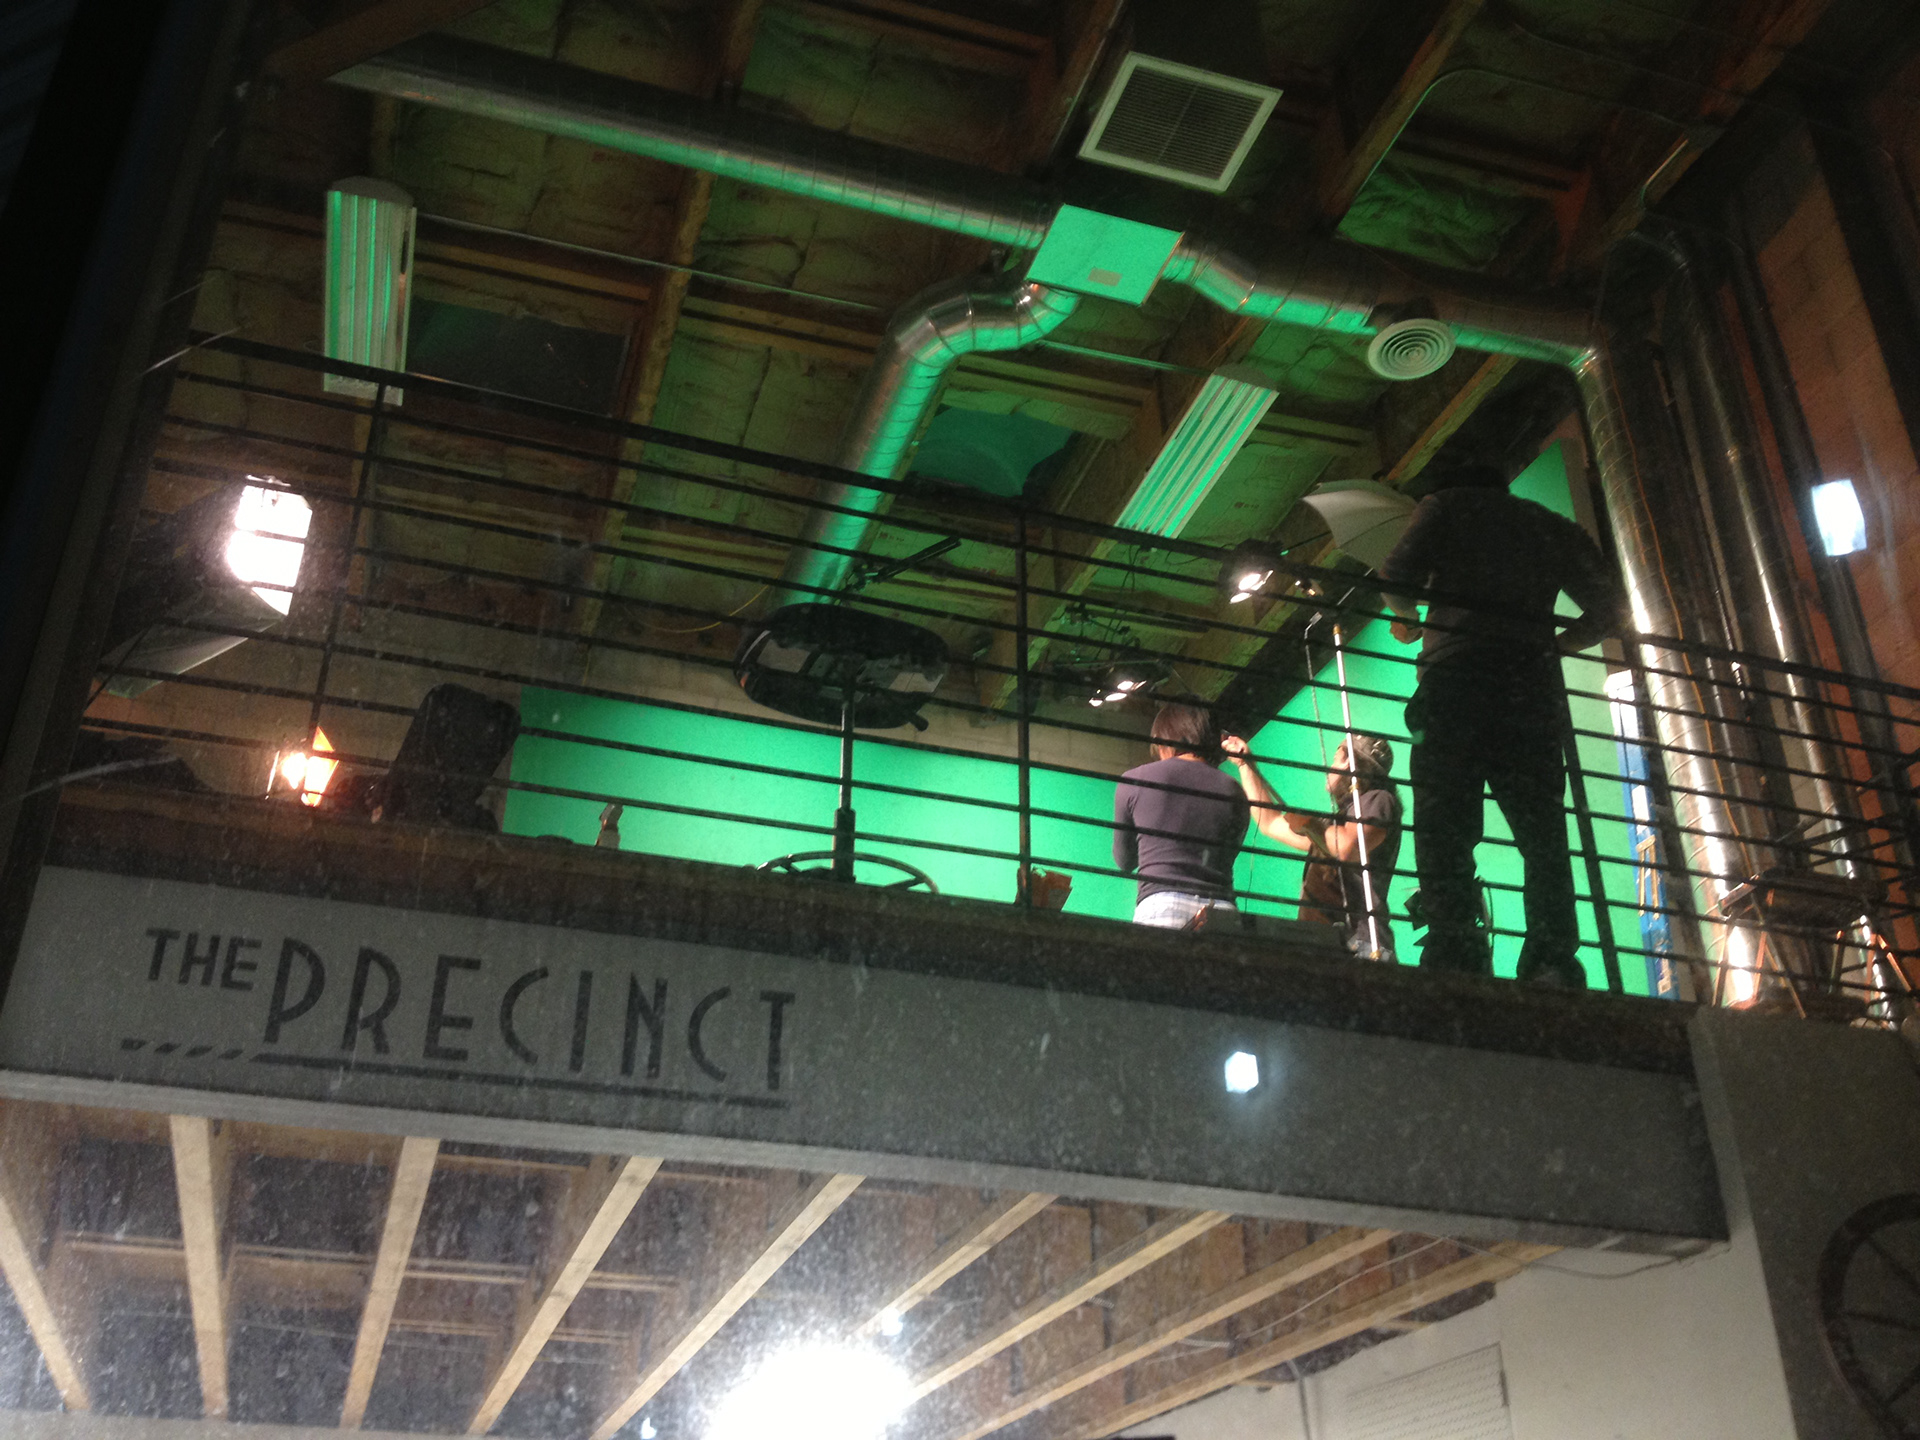
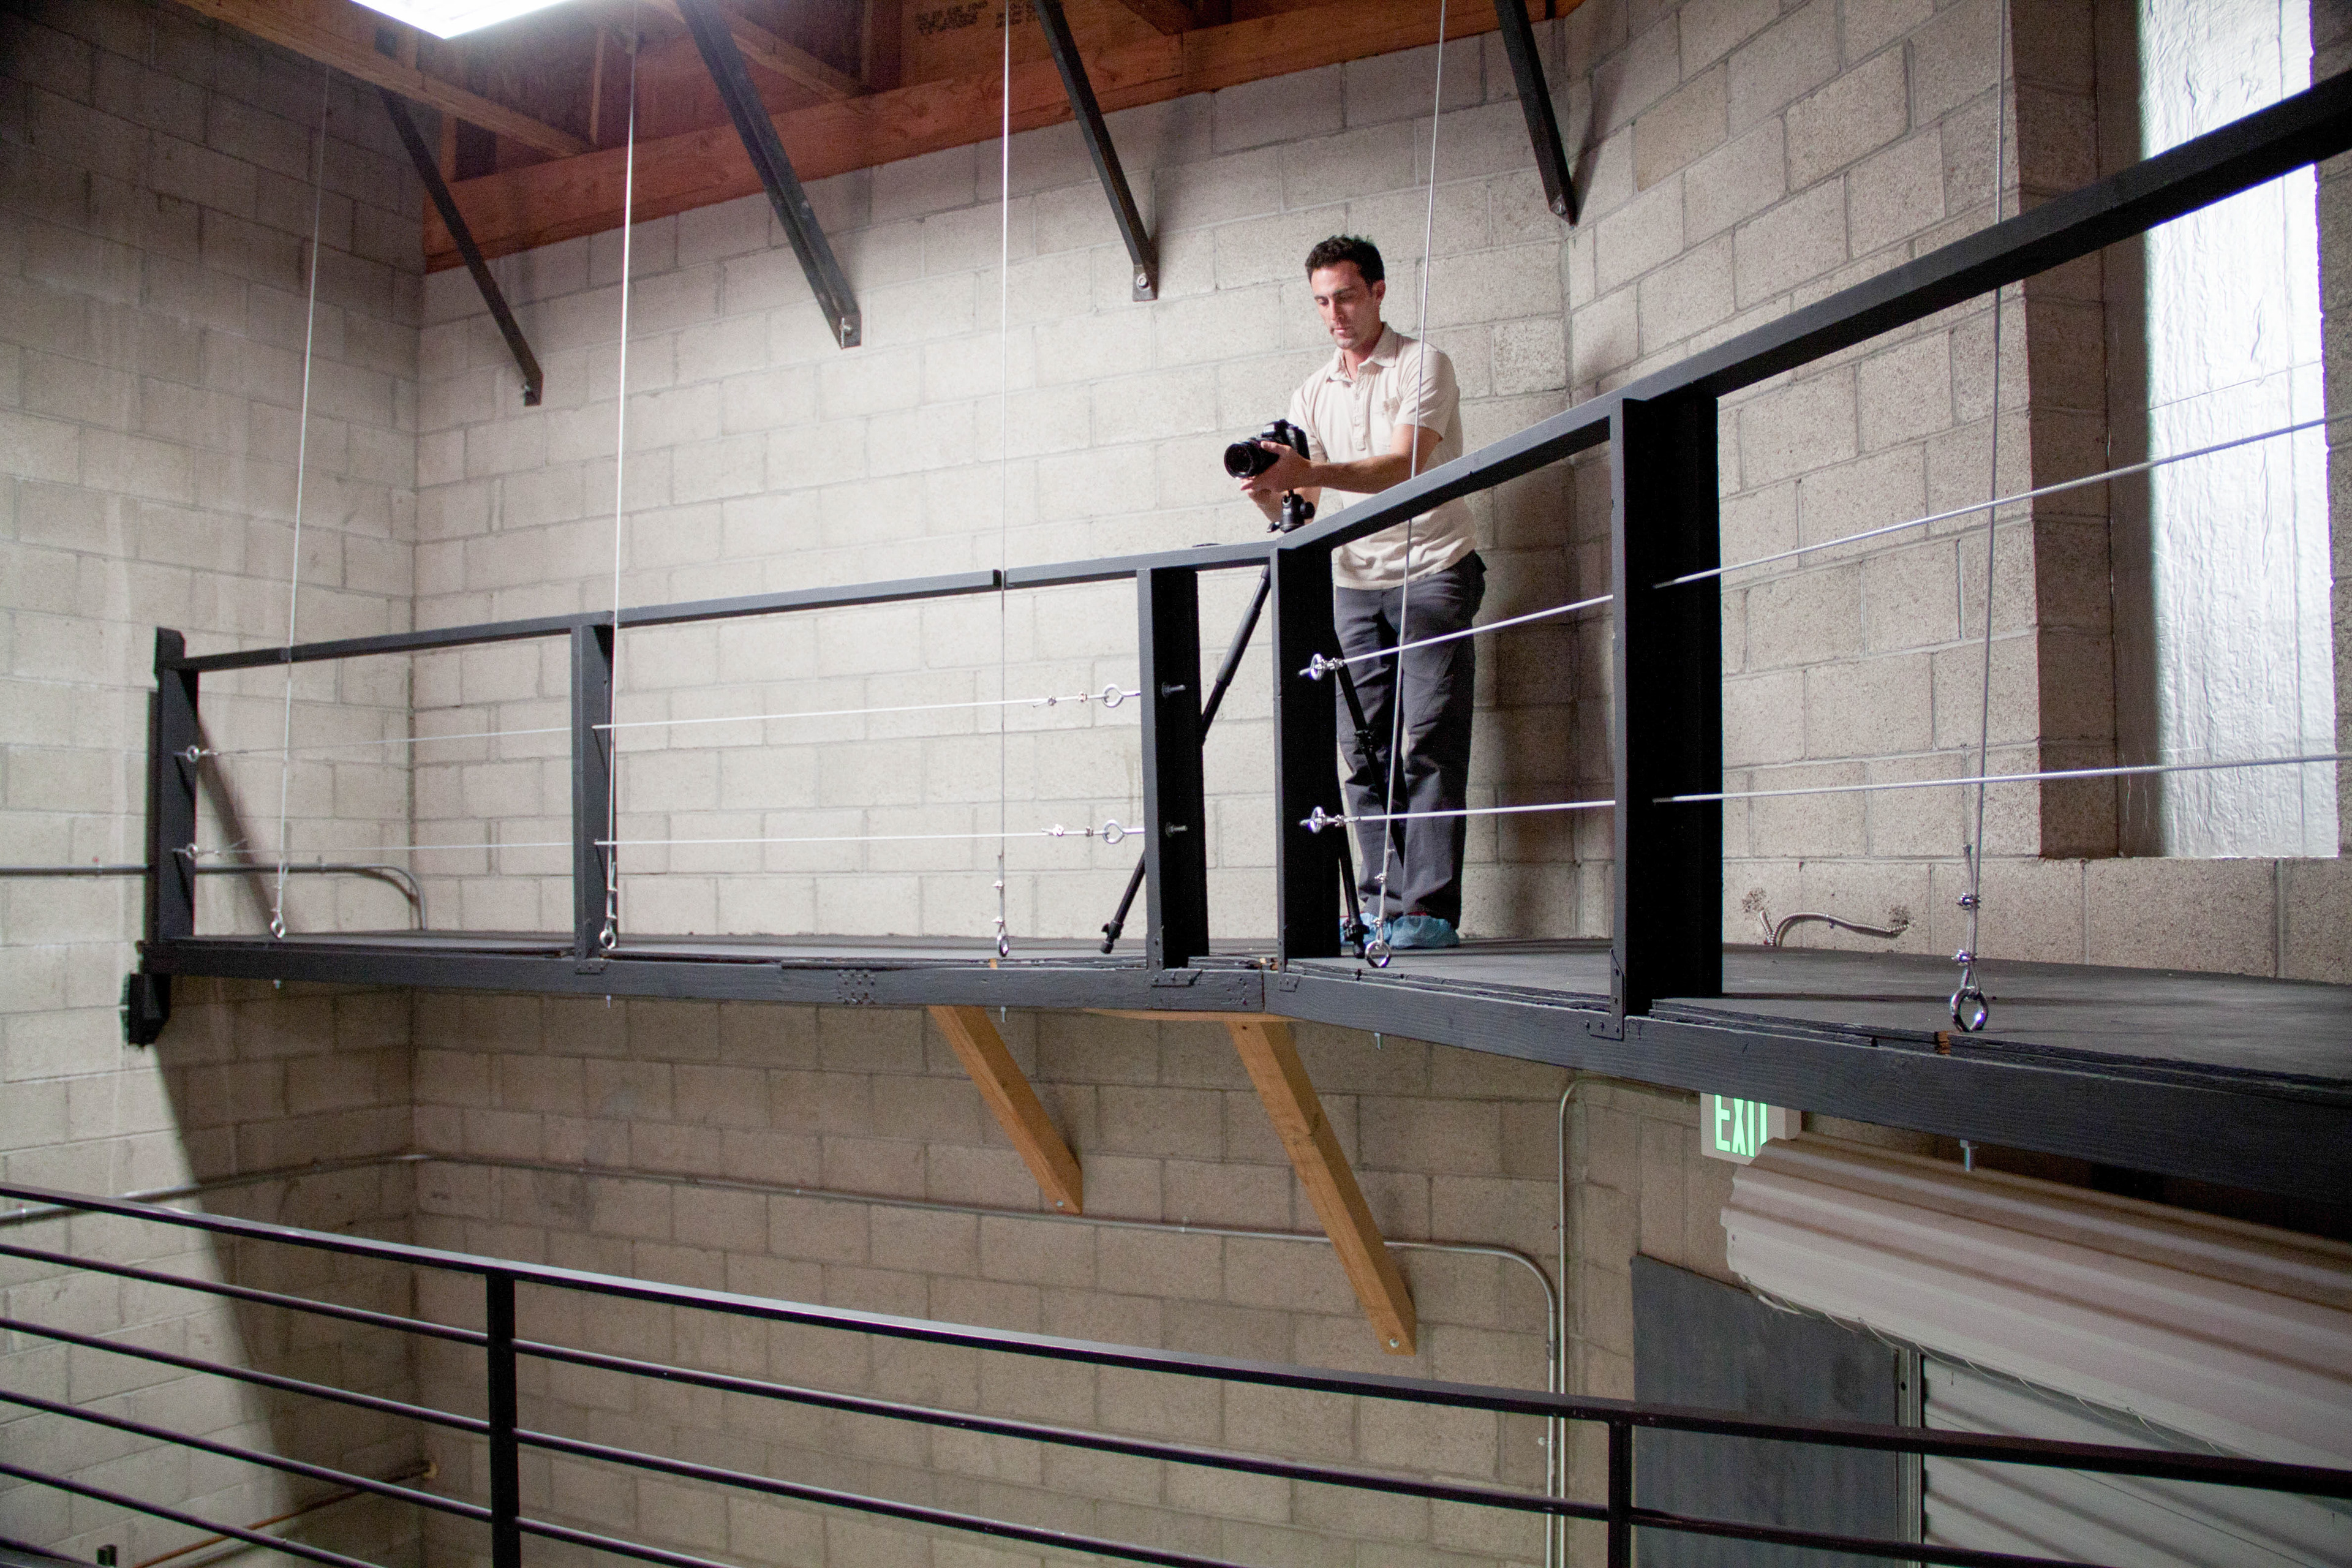
As you can see above and below, the elevated platform provides effective camera (or light) placements that would otherwise only be possible in a much larger studio.
One of the final details of the construction was to give the studio a name tag of sorts. The first step was to clean, mask off, and paint the face of the i-beam holding up the outer edge of the mezzanine level with white rustoleum.
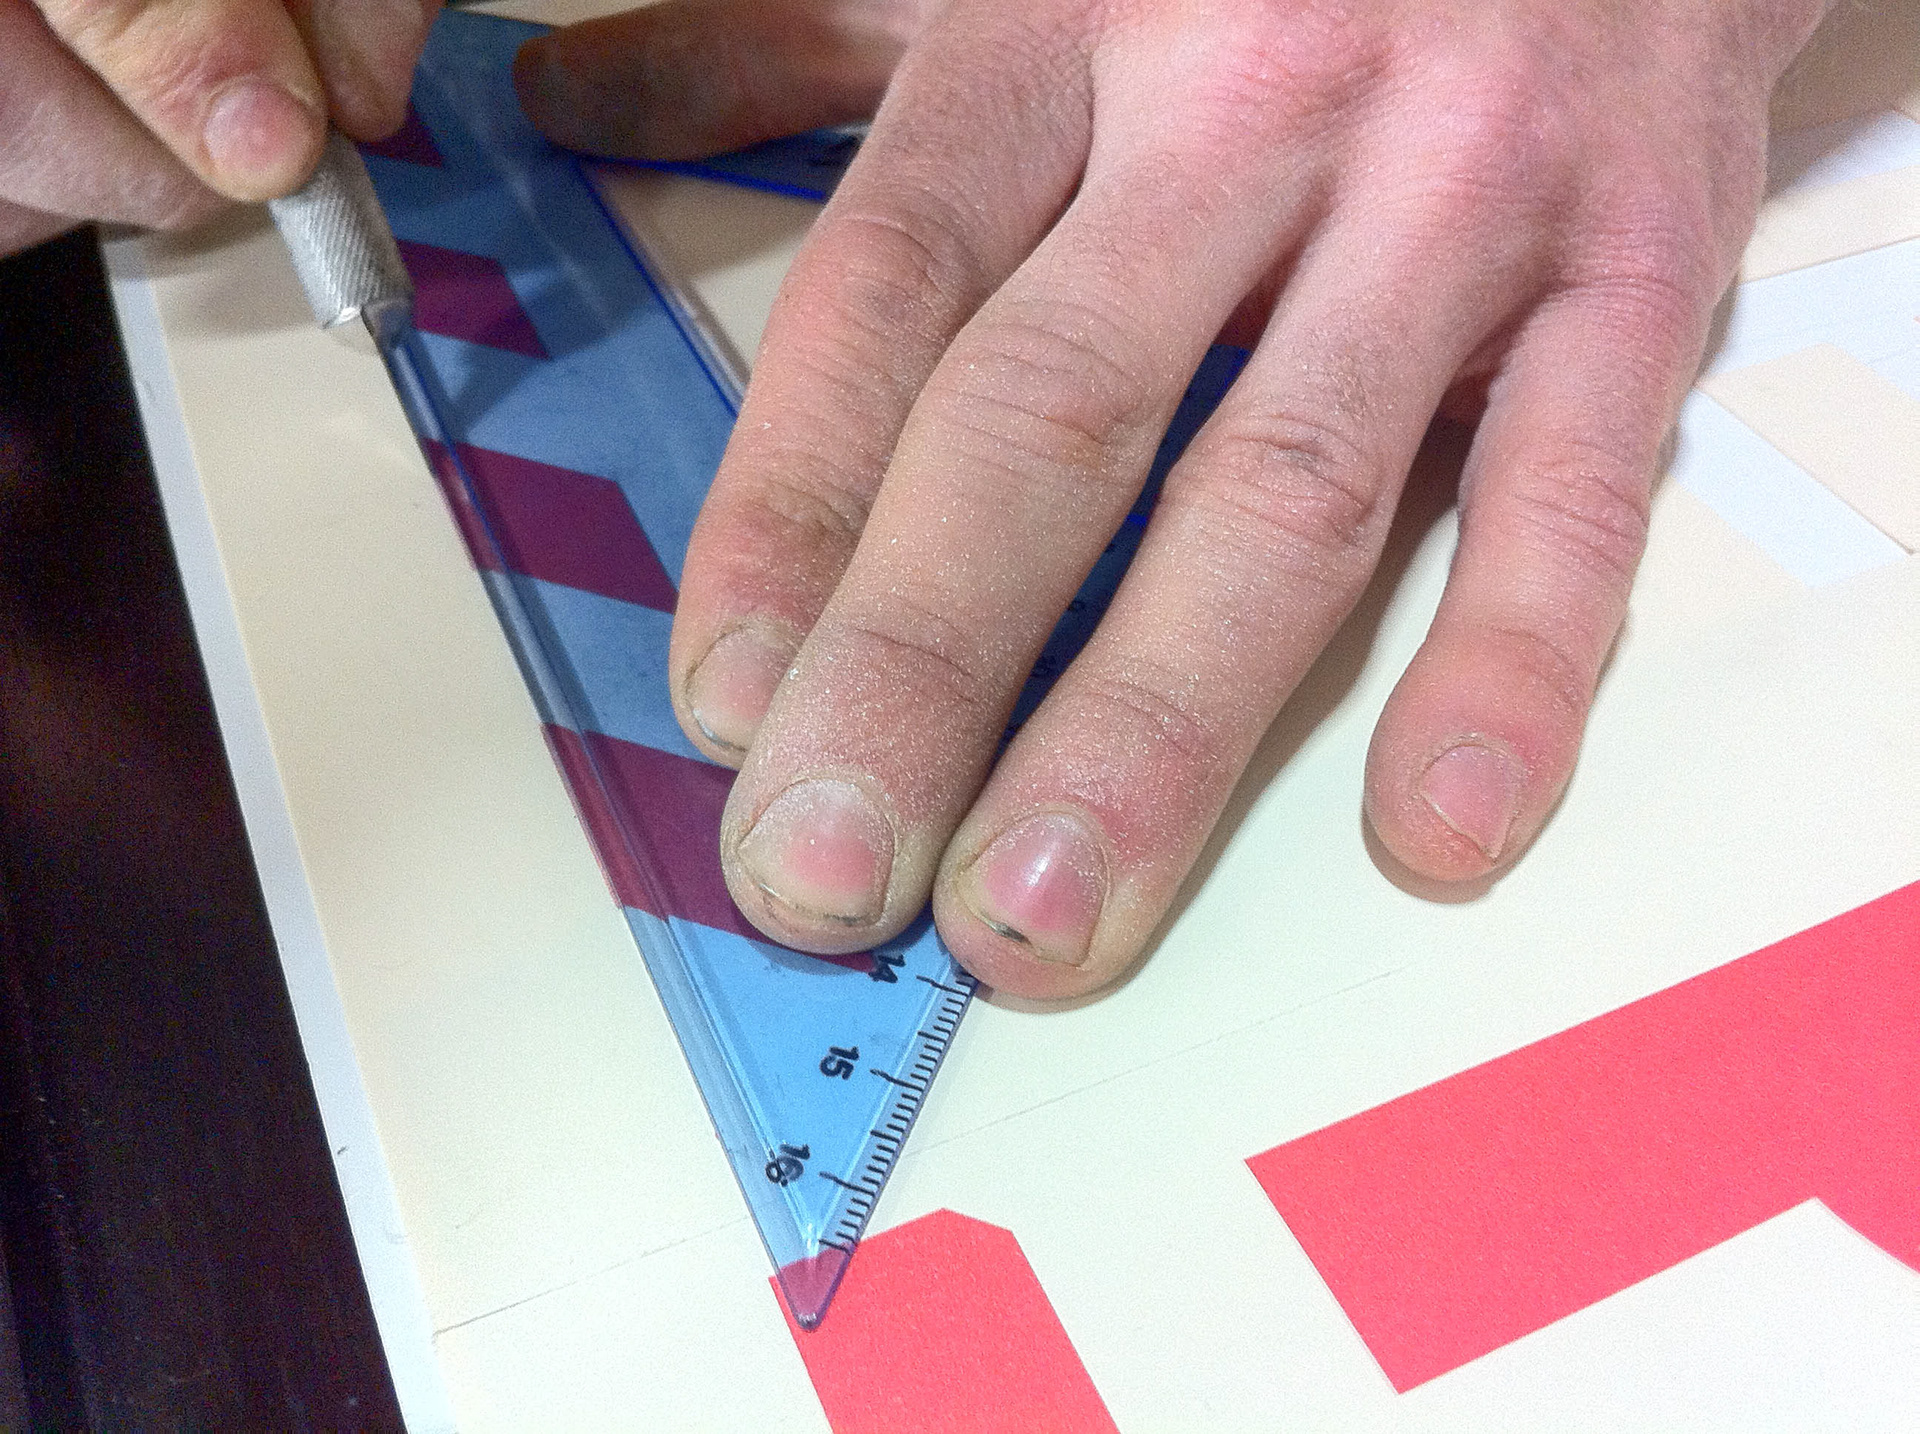
I printed the logo at a large size using several pieces of card stock taped together and cut out a stencil using an x-acto blade.
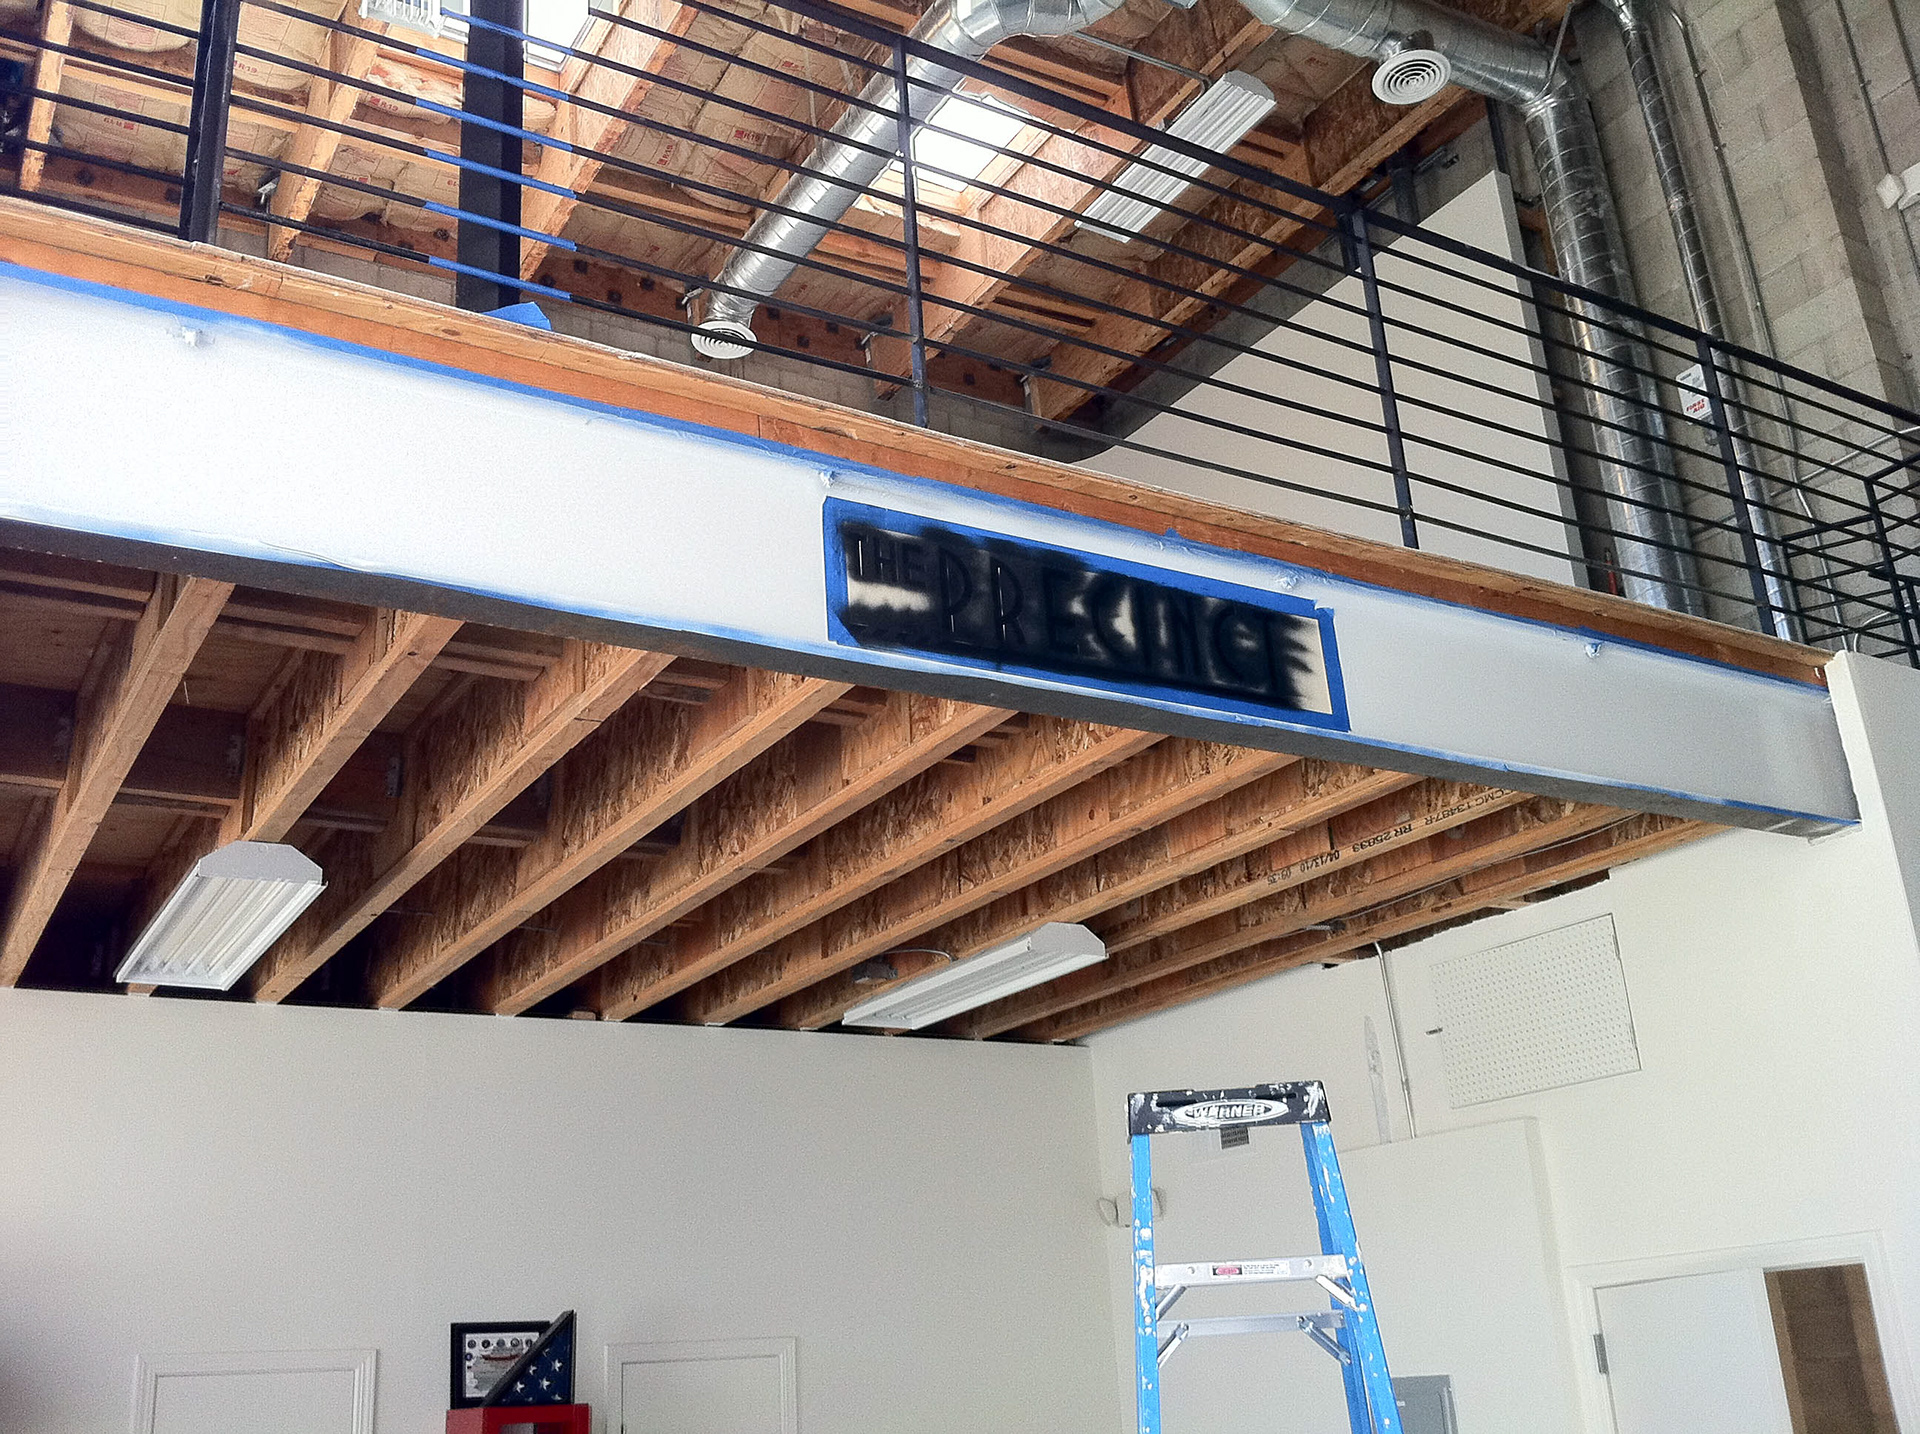
With the stencil in place, I used black glossy rustoleum spraypaint to brand the i-beam.
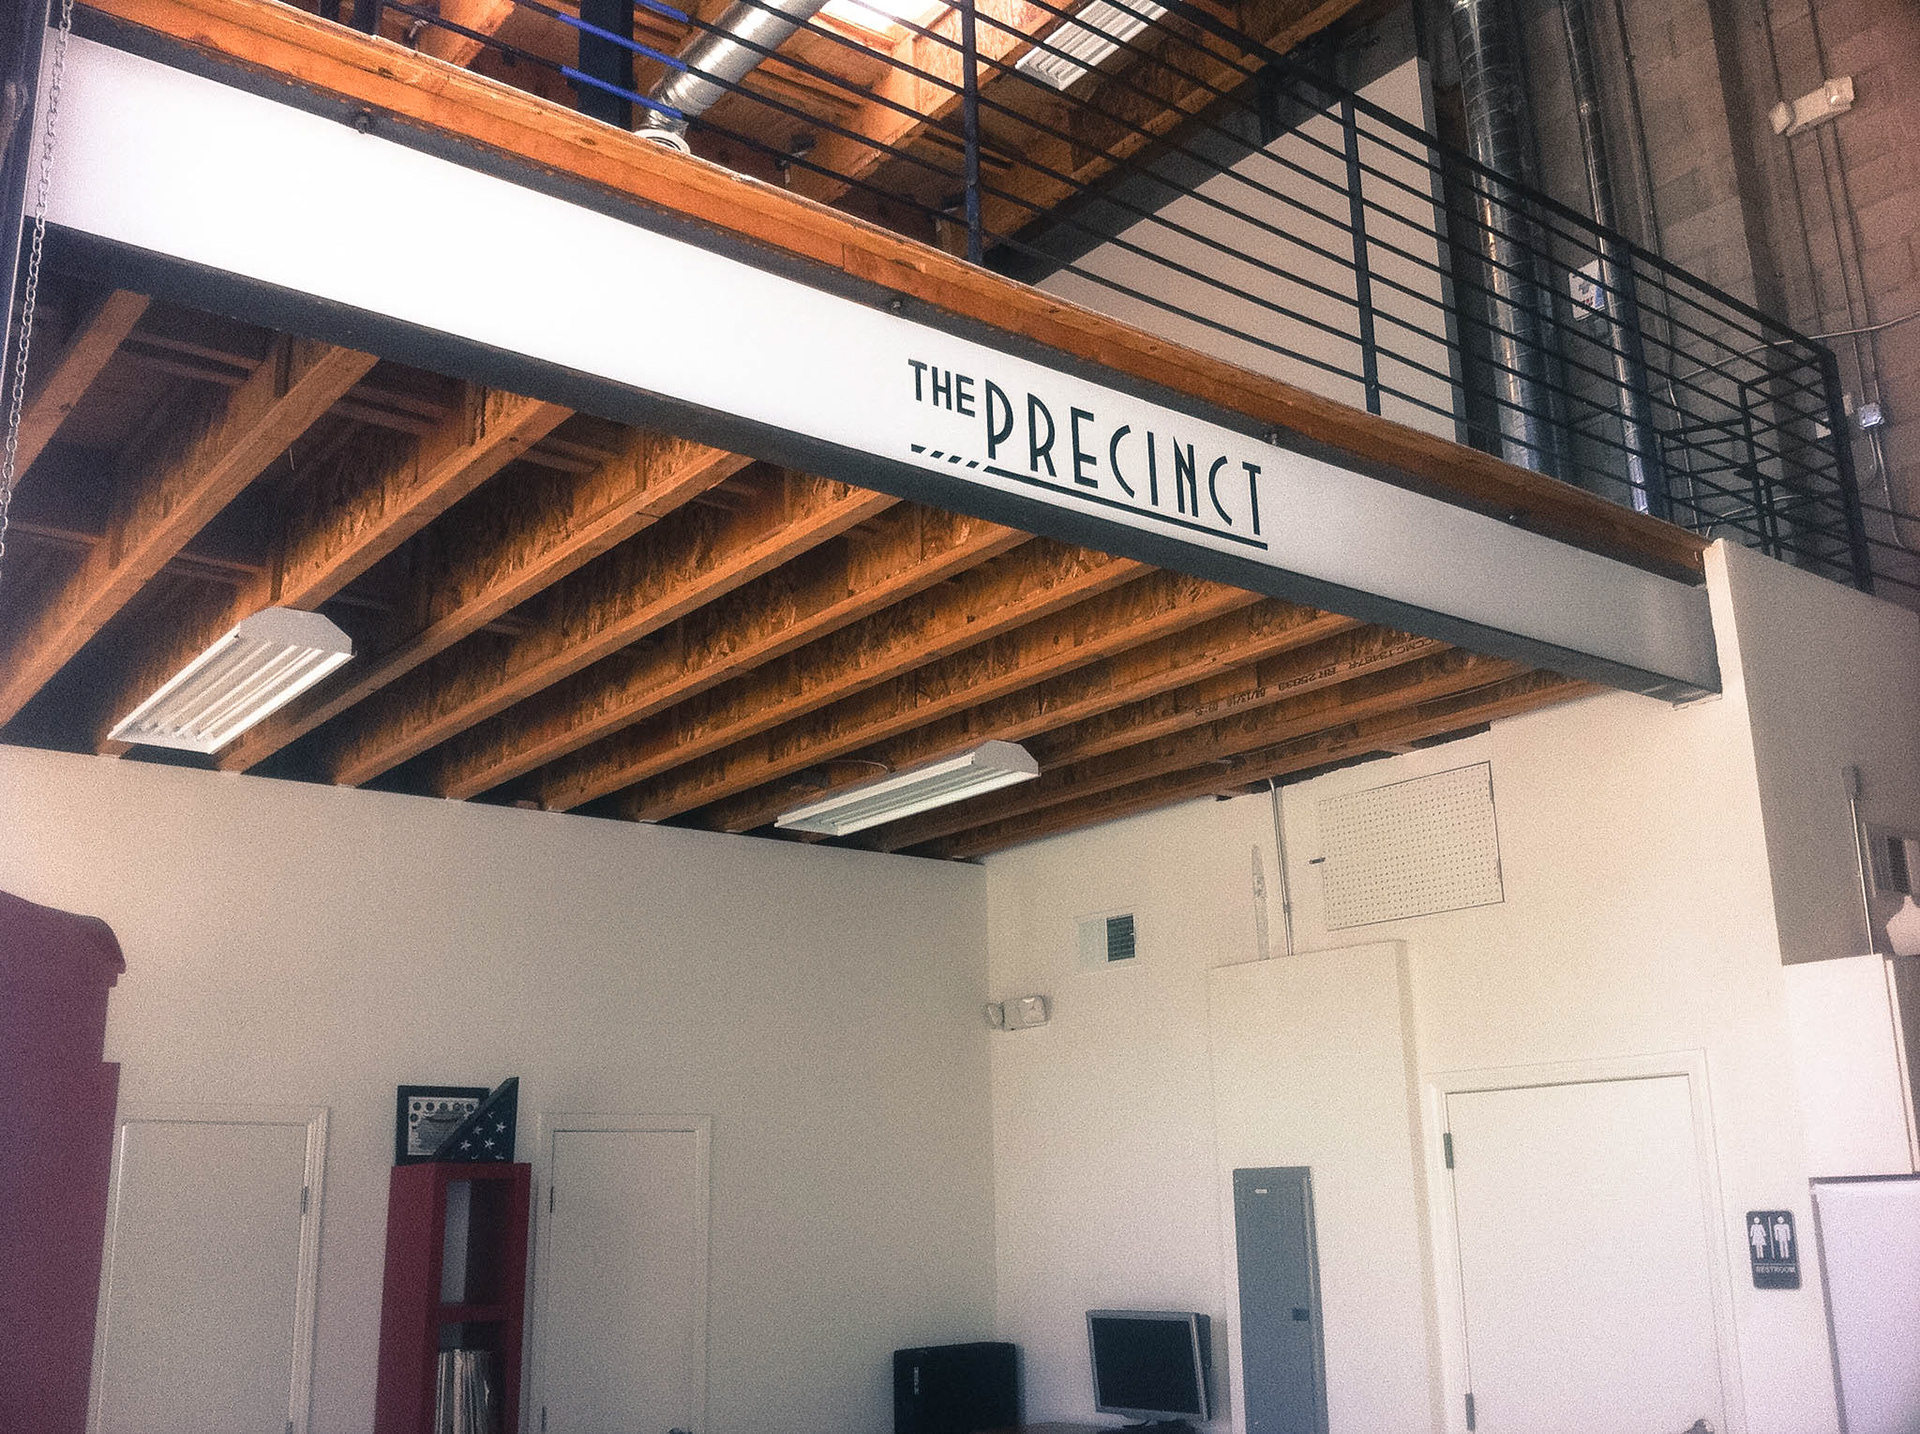
There would be no mistake where you were when entering the studio through the pedestrian door and the logo was clearly visible from outside when the large roll-up cargo door was open.
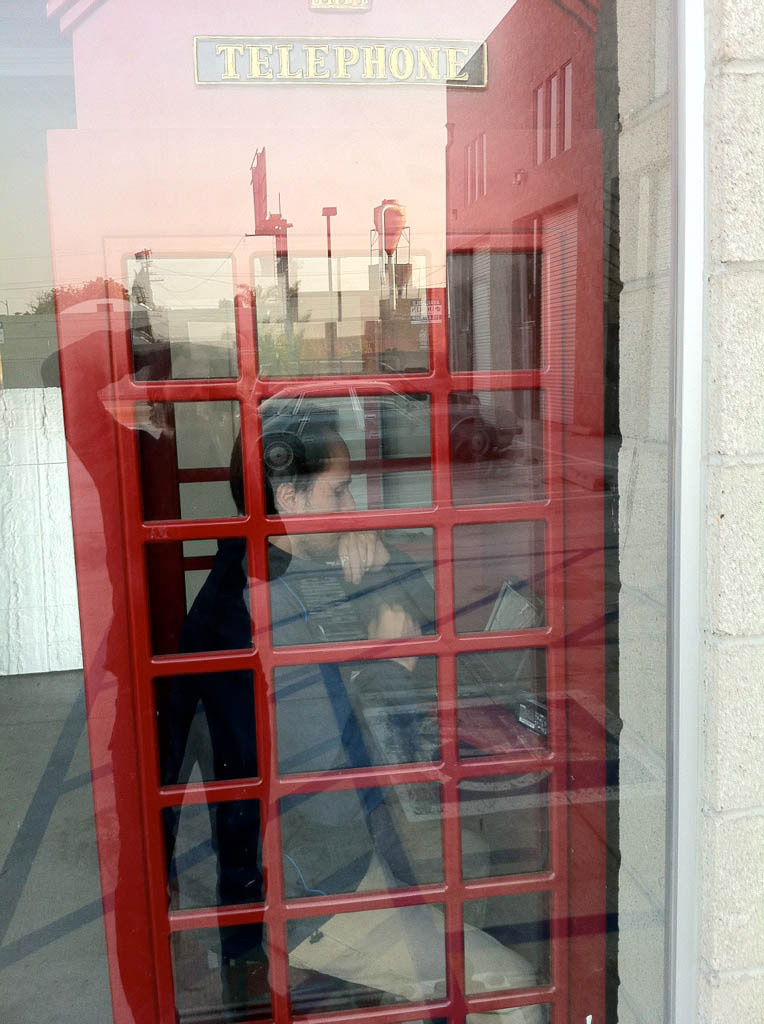
Above you can see someone working inside one of the "skype booth" workstations which were built inside converted red british phone boxes and placed inside the downstairs front window of the studio. The process of creating these would be the subject an other entire project page unto itself.
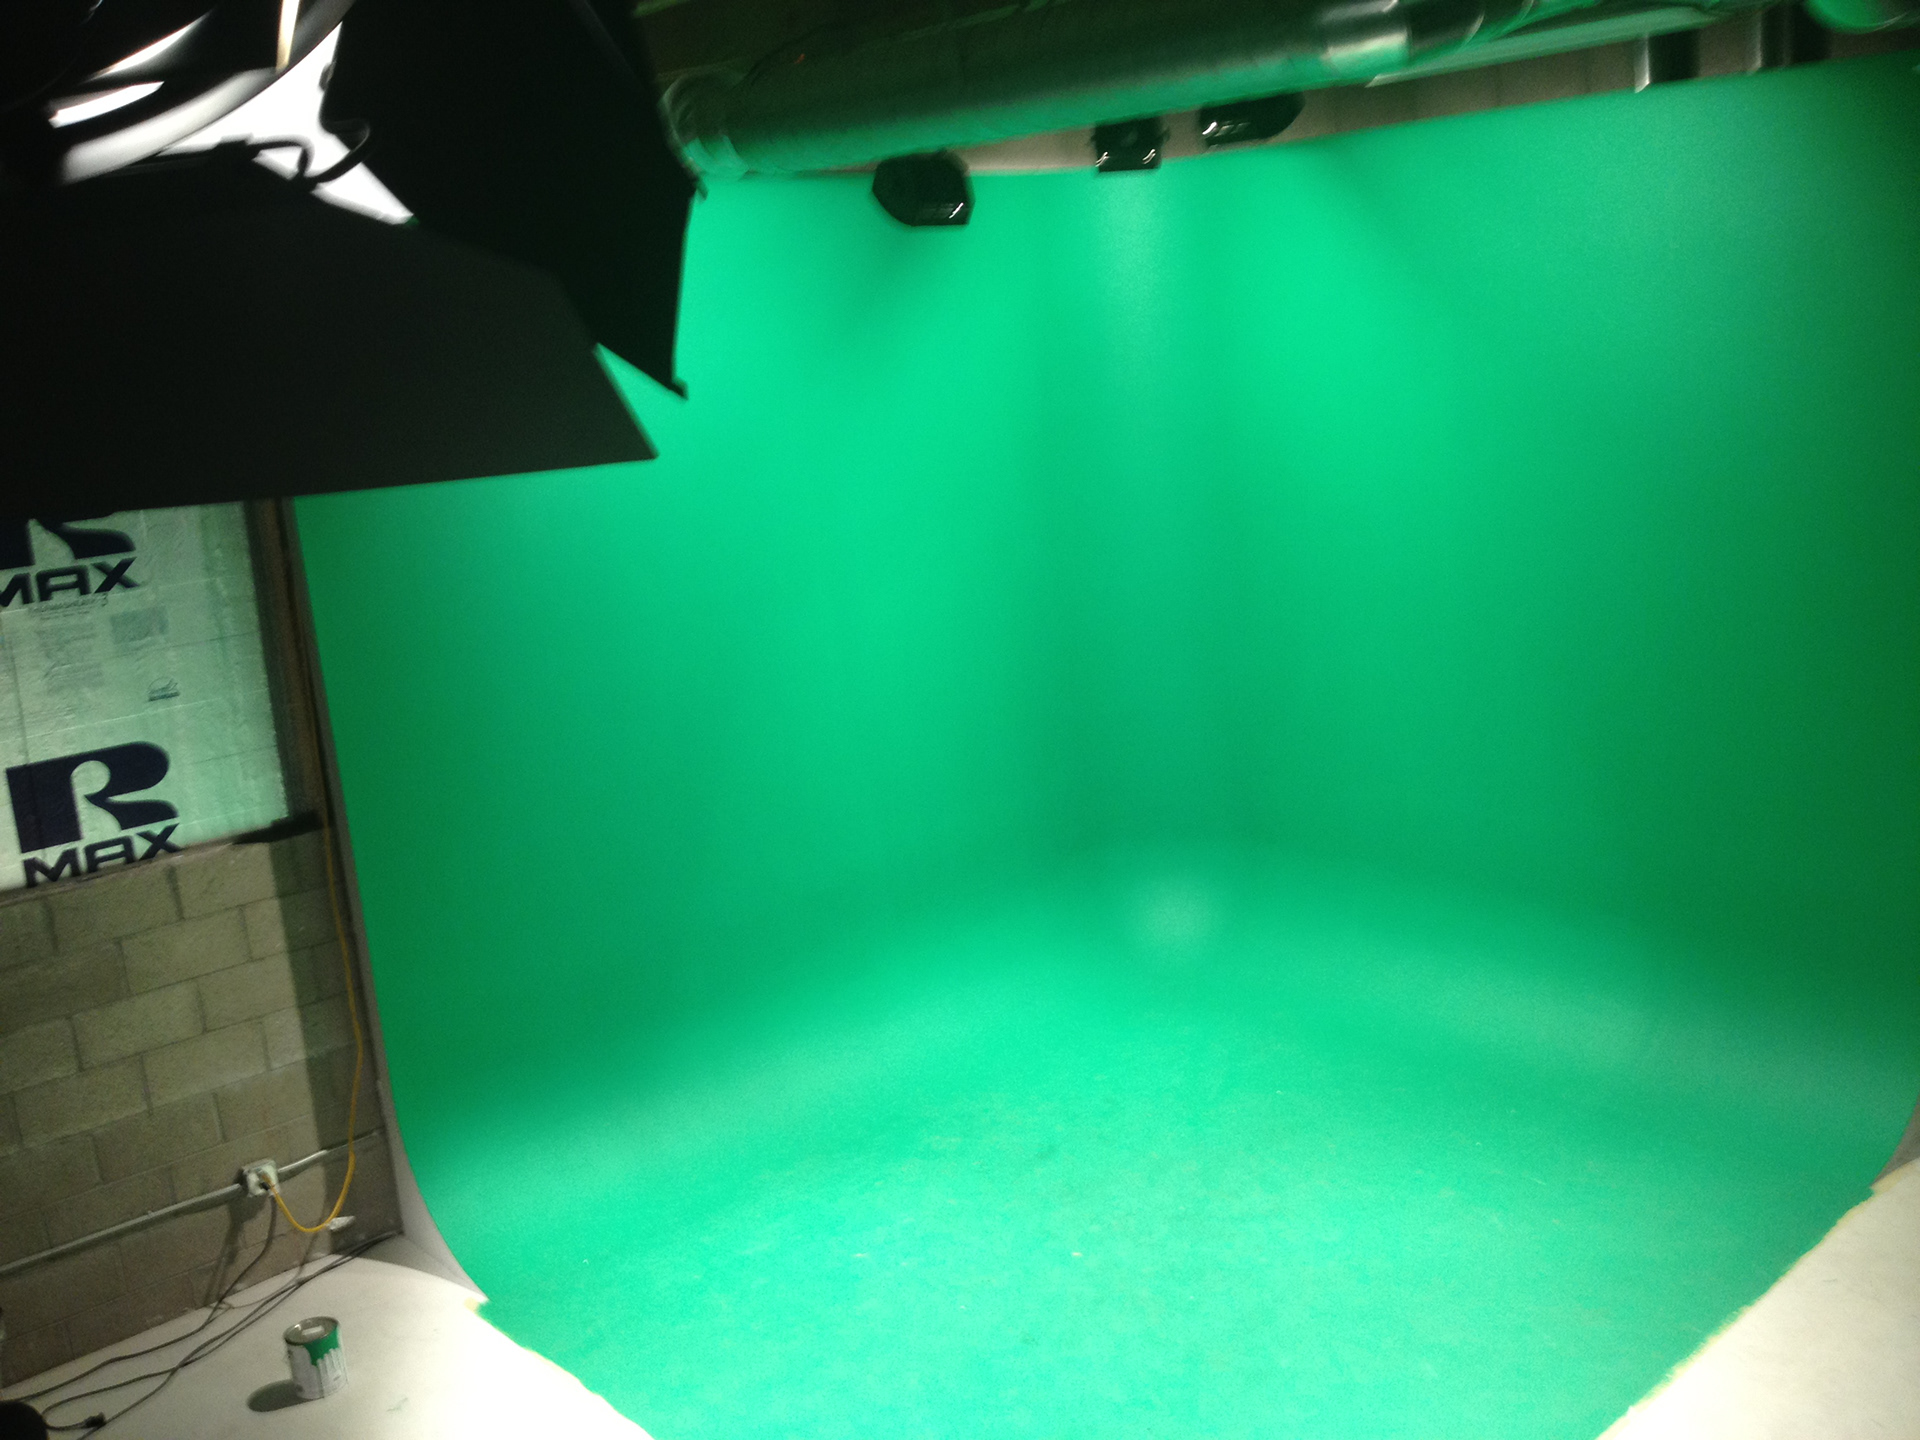
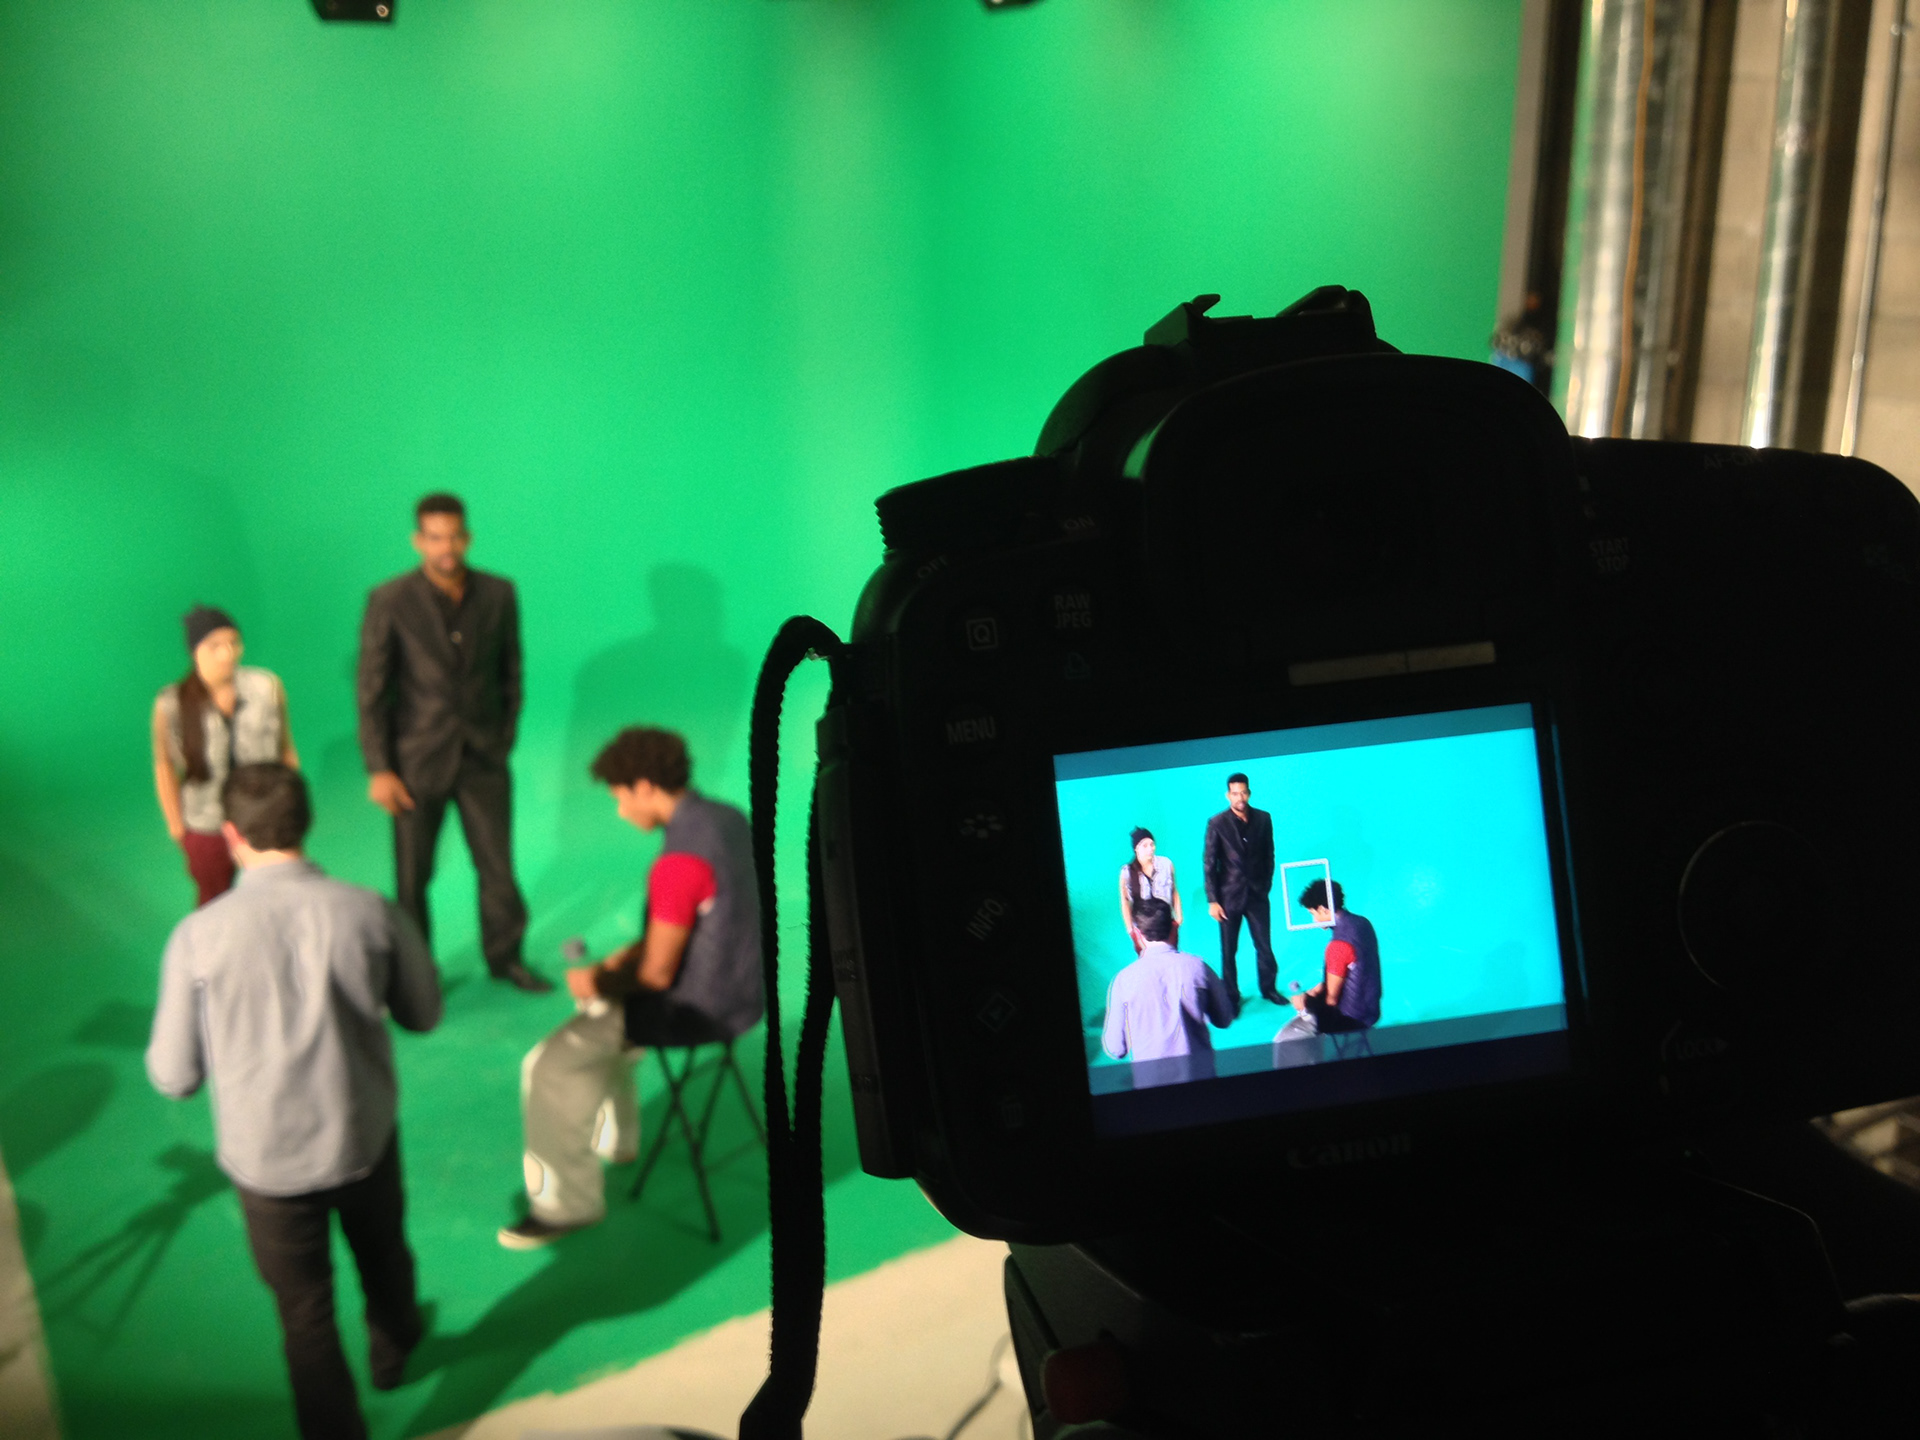
The cyclorama was painted green or white as needed and (as you can see above) had cyc lights mounted to the beams above the walls as well as a 1.5K spot mounted to the ceiling next to the catwalk platform. Below you can see the studio in use just a few weeks after construction.